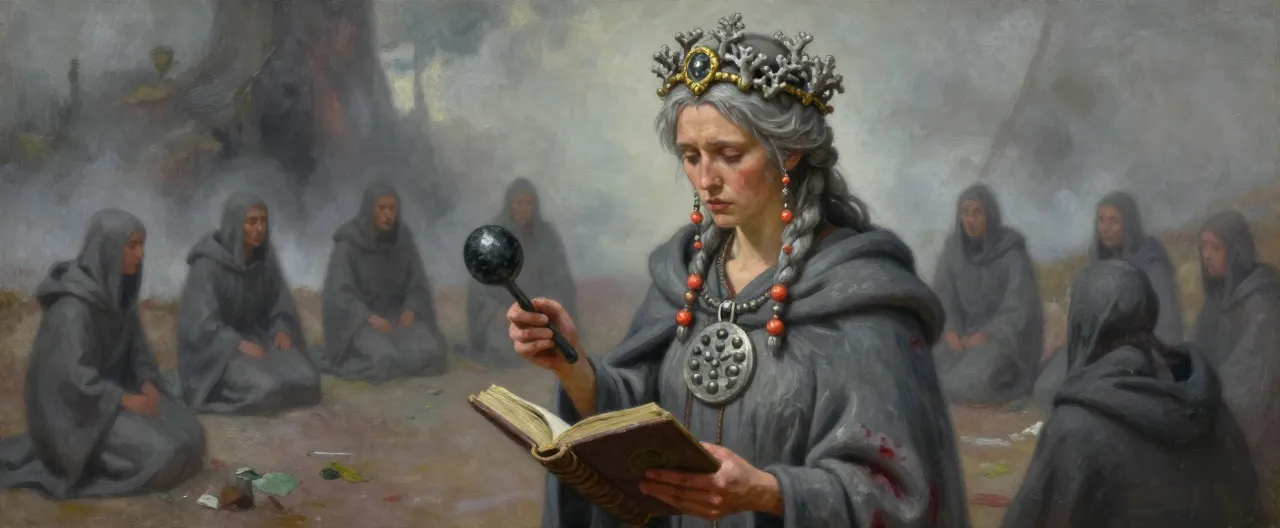
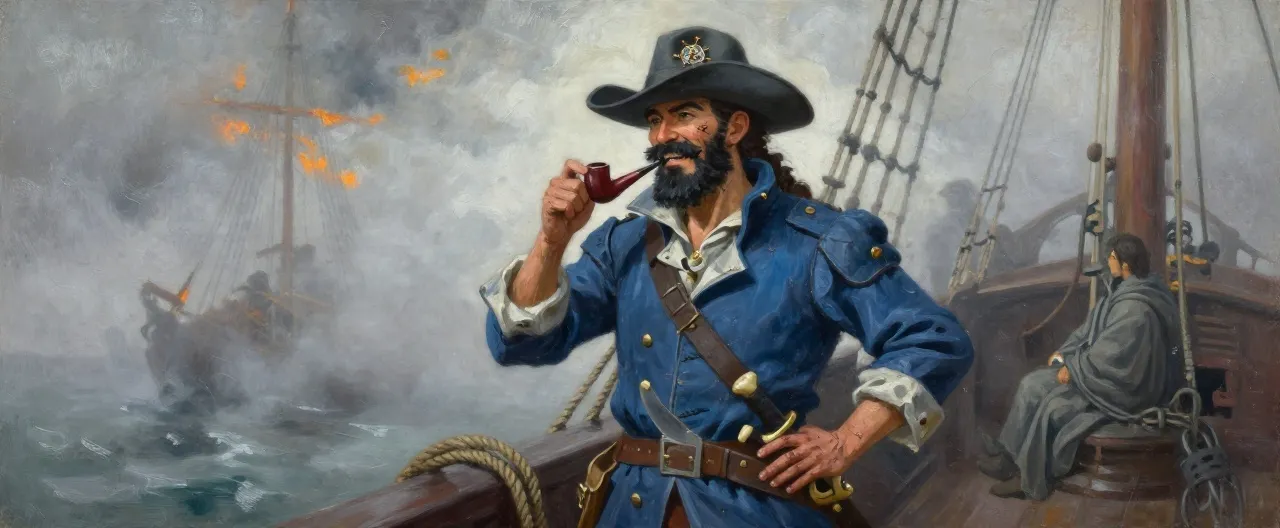
The adventure ahead

Campaign Overview

The Blood Price of Borealis

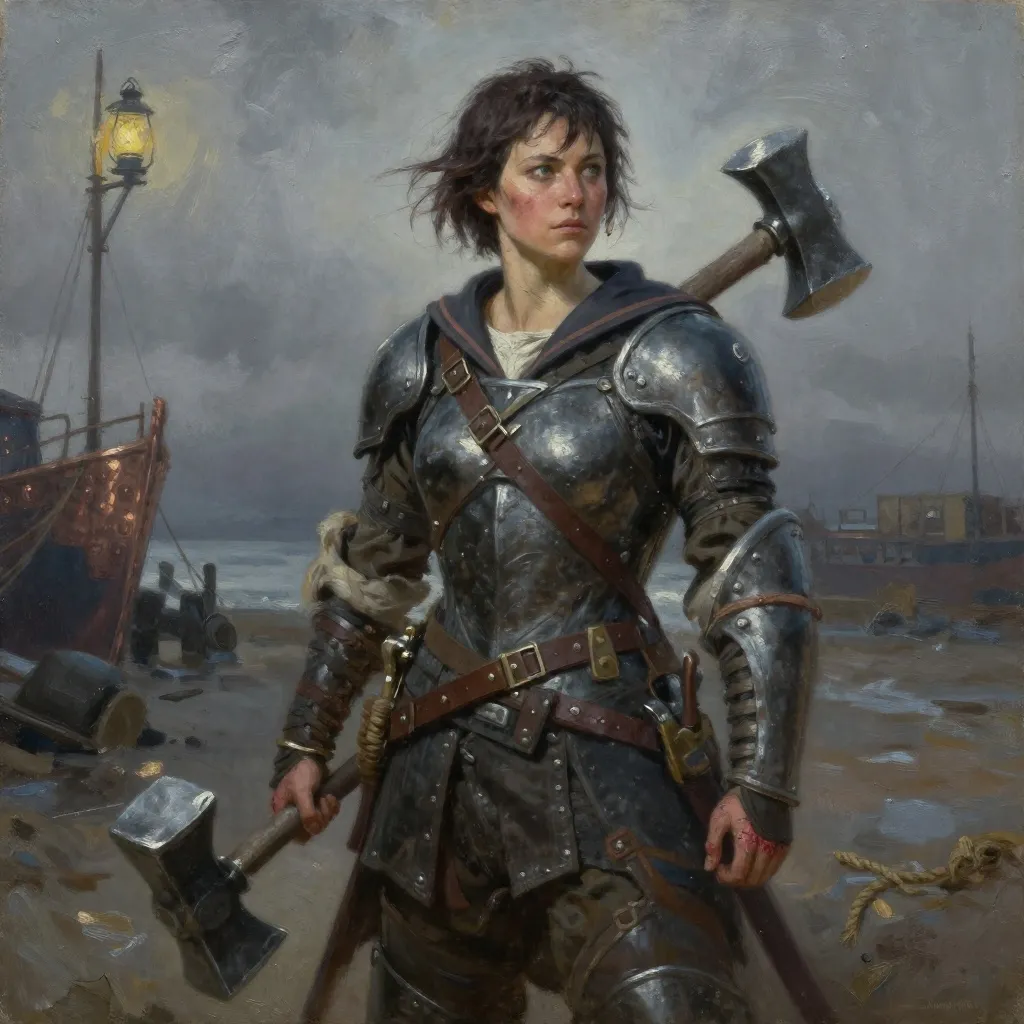
Carl of the Seven Seas has come home. The famous adventurer, sailor and treasure hunter — and younger brother of King Soleiman — has returned to the City of Lordinium after nine years away, and he is hiring.

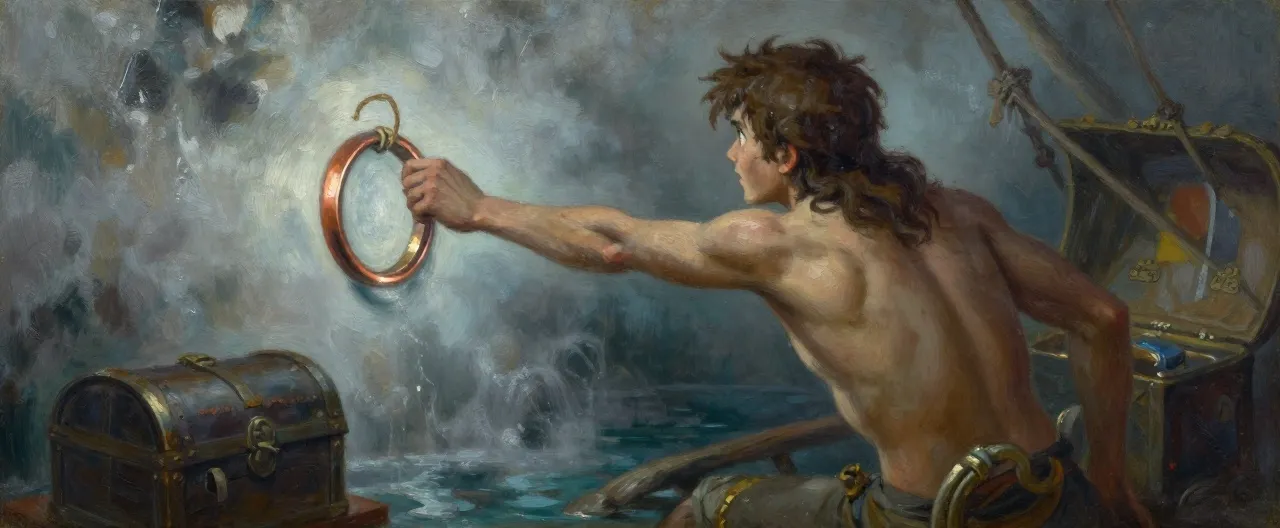
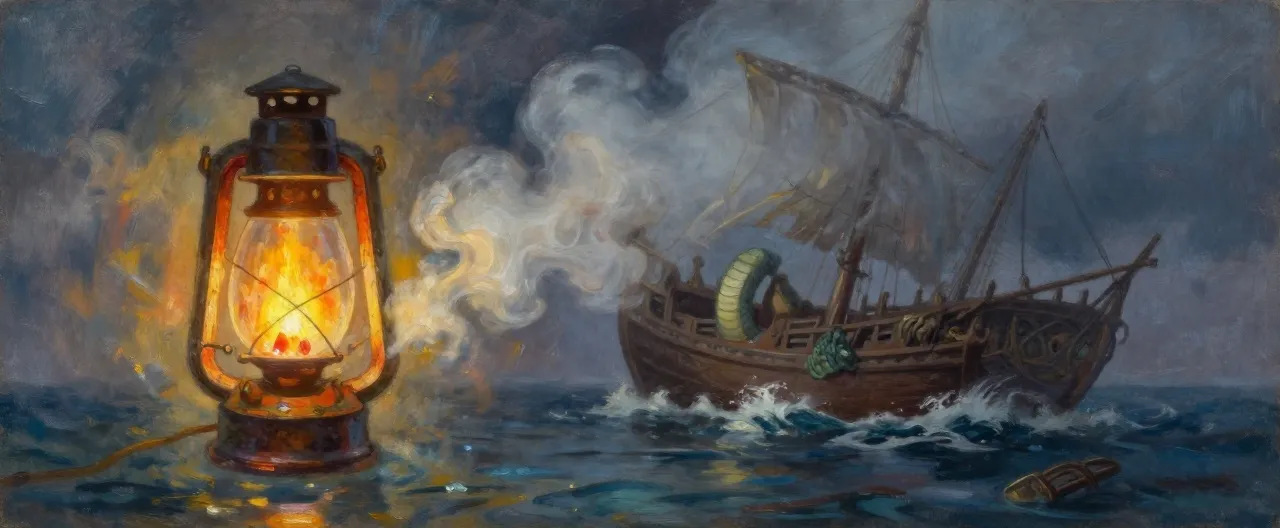
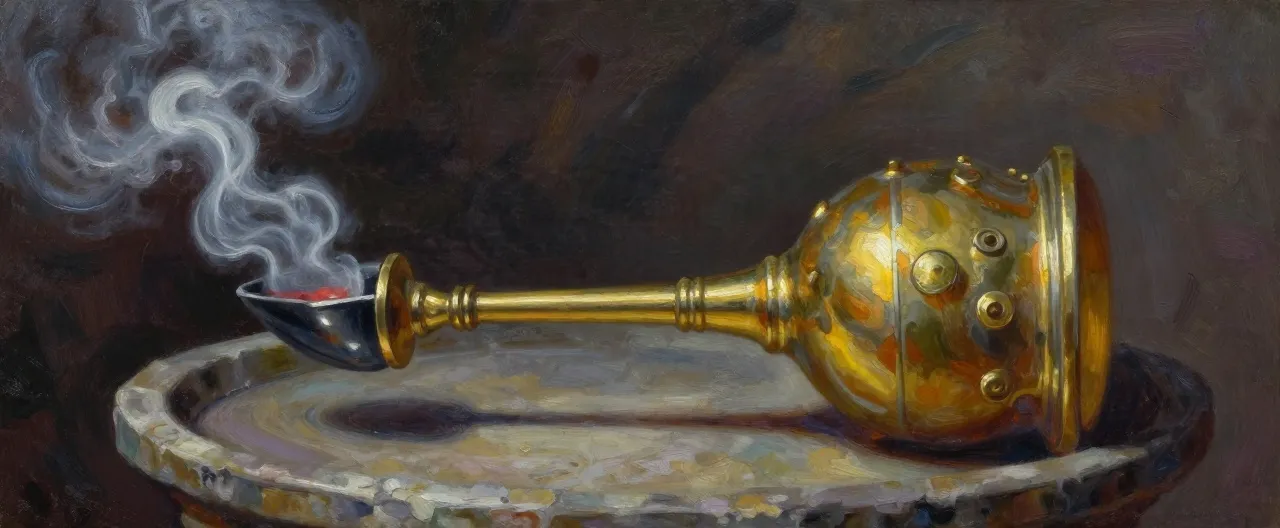
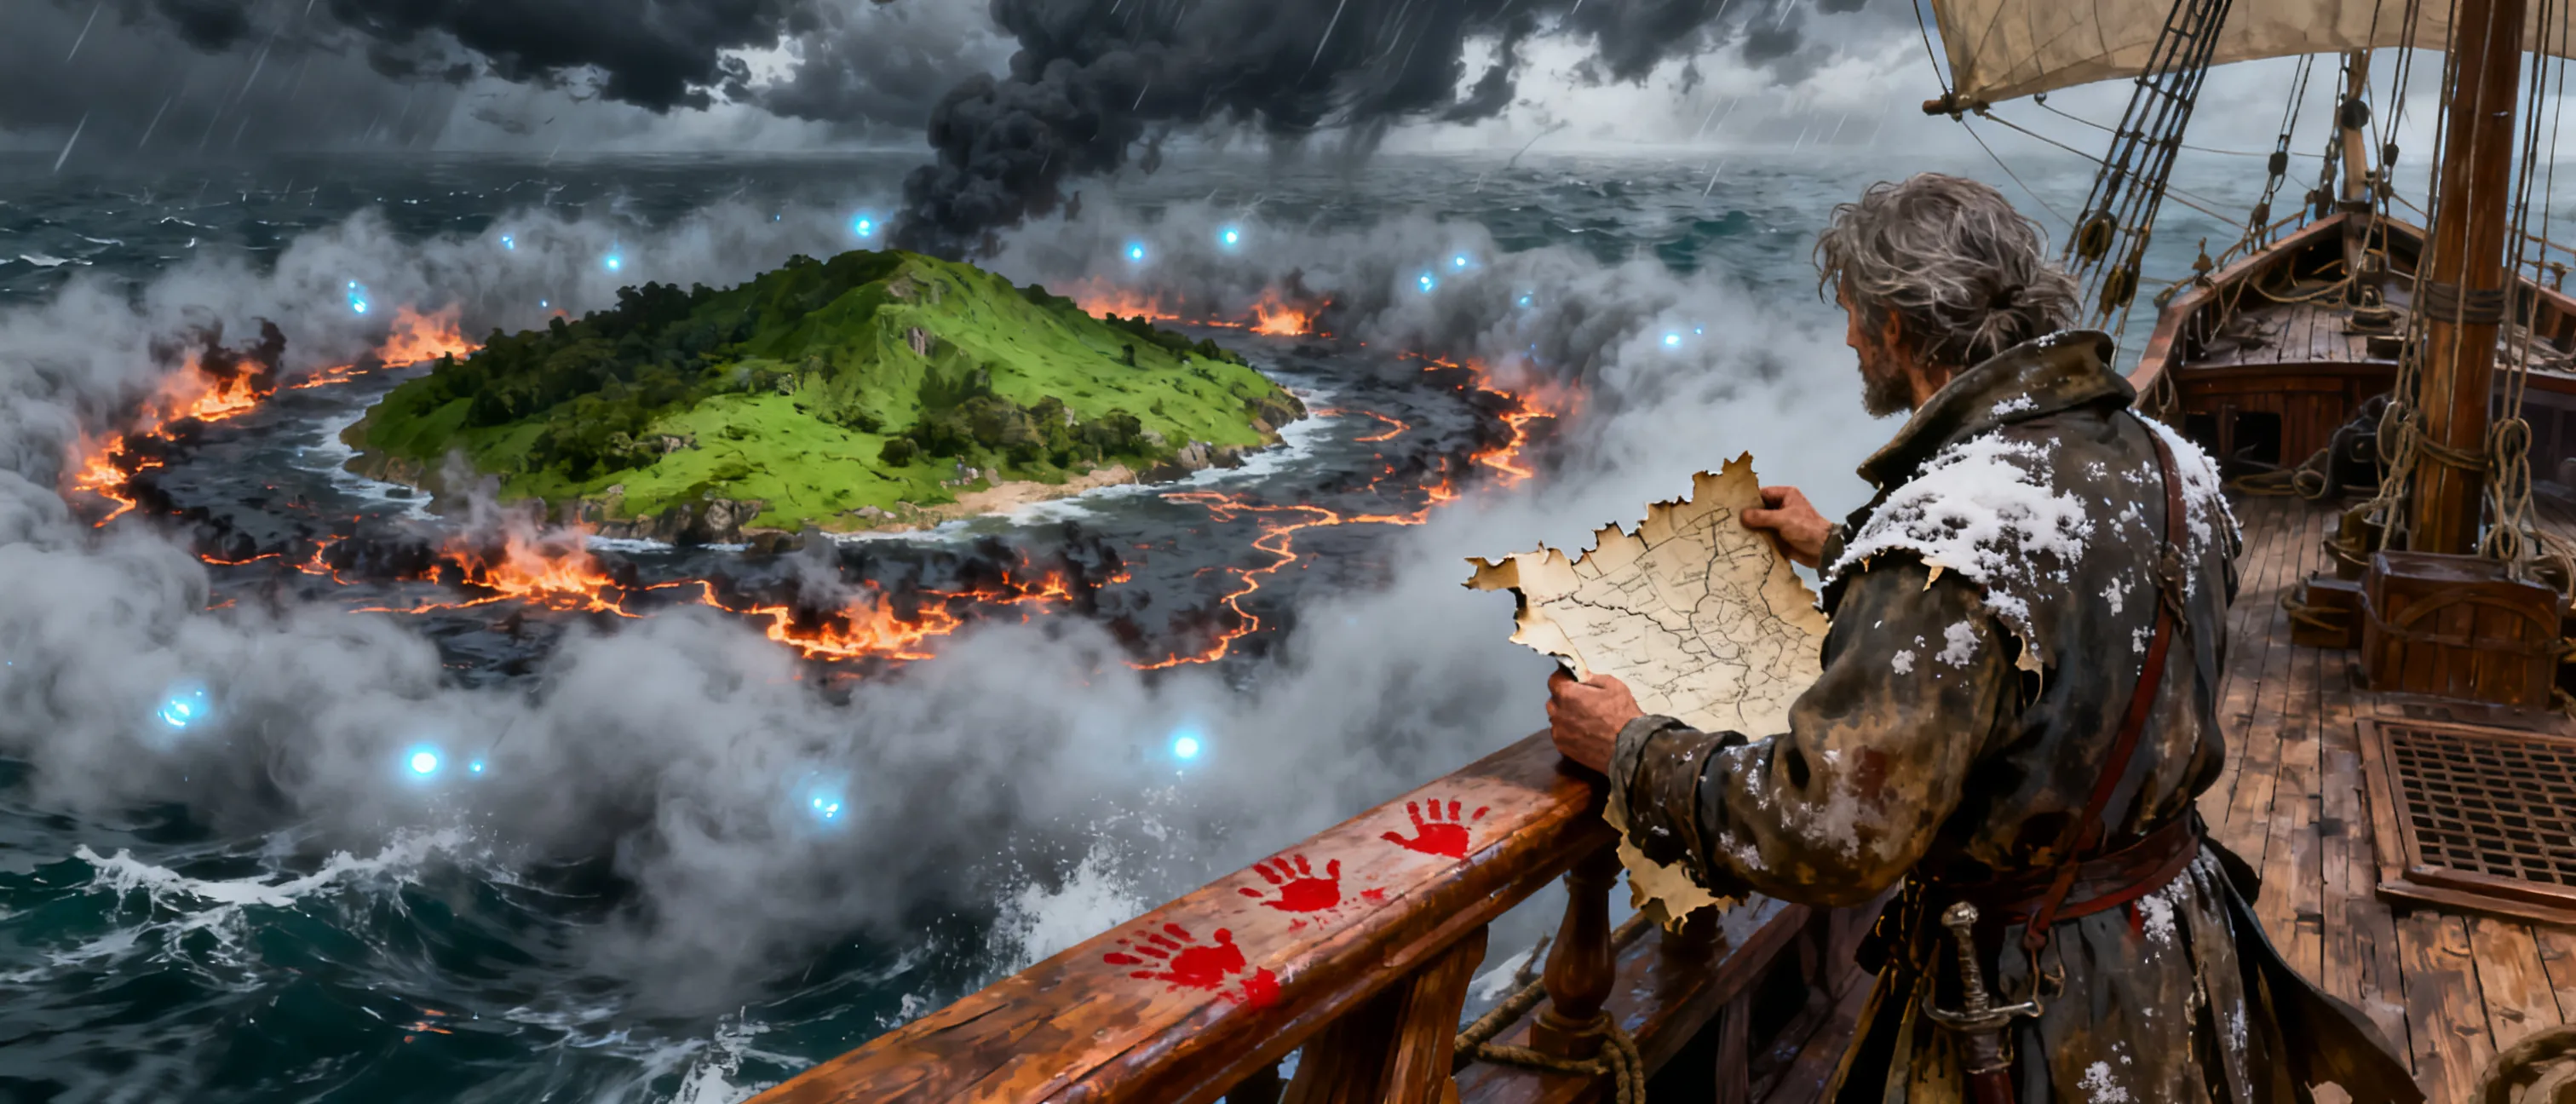
Far in the north, where the air grows thick as water, Carl found the Island of Borealis: the legendary homeland of the Seven Nations, hidden behind a magical fog and ringed by a sea that burns and smokes. Beyond the fog he glimpsed a lush paradise — and creatures that were once something else, twisted into demonic shapes.

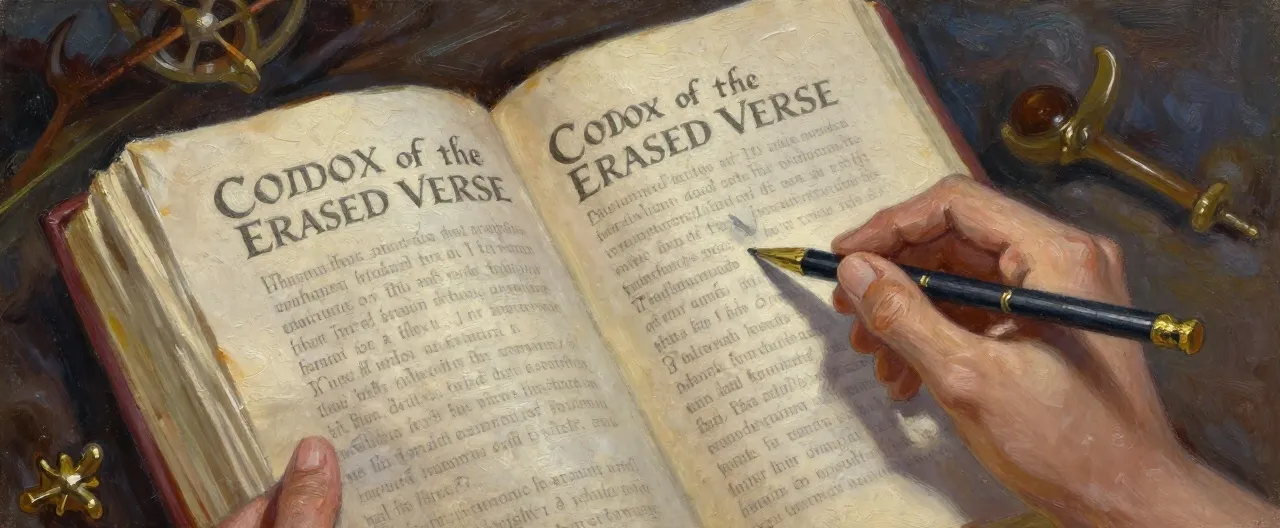
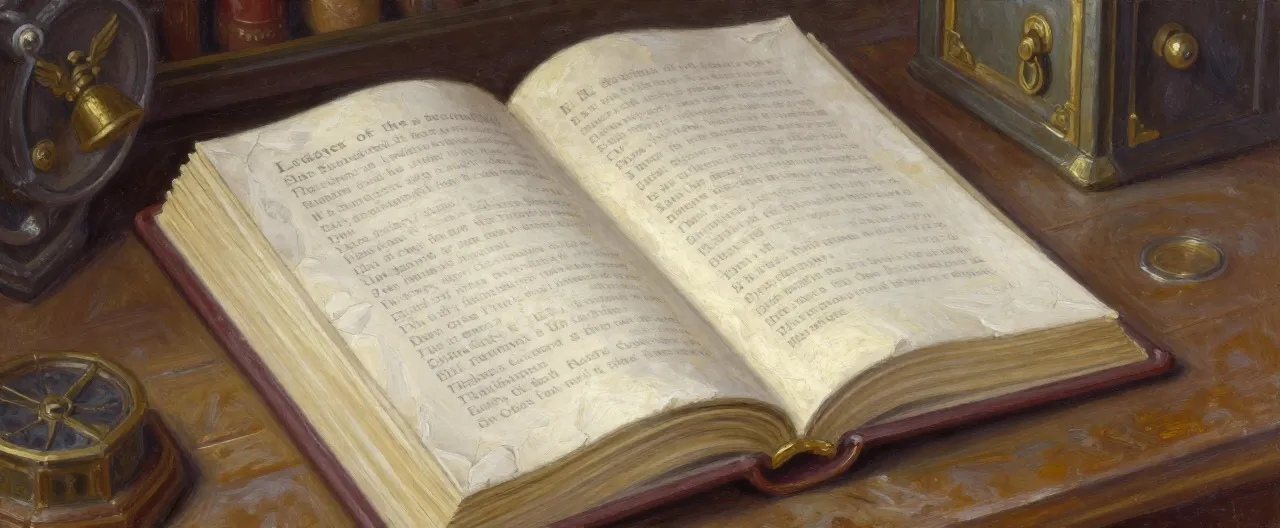
The old scriptures say the Seven Nations lived on Borealis in harmony with the Twelve Gods, until a Thirteenth god tried to take all power for itself. The scriptures also carry a warning: any return will incur a price of blood on those who return. Most of that warning has been scraped away. Only a few heretic copies still carry the words.

You have signed on with Carl's expedition. You will sail north, pass the burning sea, cross the fog, and walk a paradise that eats its own. And the further you go, the clearer it becomes that the warning was not a metaphor.

Tone: wonder, salt, and slow dread. A treasure voyage that turns into an excavation of a crime.

Themes: what a nation will pay to be saved, who does the paying, and whether a god's hunger is a curse or an invitation.

Share with your players

Player Handout

You Are Hired

A letter, sealed with the crown-and-wave of Lordinium, delivered to you by a boy who would not wait for a tip:

> *To whom it may concern — Carl of the Seven Seas requires hands for a voyage north. Pay: forty gold on signing, a full share on return. Risk: considerable. Bring a warm coat and a weapon you trust. Present yourself at the Salt Crown on the harbour front at dusk. Ask for Halda.*

Carl of the Seven Seas is the King's younger brother and the most famous sailor alive. Nine years ago he sailed north past the last charted water and came back with a torn map, a burnt ship and a story nobody believed. He says he found Borealis — the island homeland of the Seven Nations, where the Twelve Gods walked with mortals. He says it is still there, behind a fog that will not part, ringed by a sea that burns.

He also says the old scriptures warn that any return will incur a price of blood.

He says that part is probably a copying error.

Tone: a treasure voyage with a cold hand on your shoulder. Salt, fog, wonder, and the growing certainty that the paradise ahead was paid for by someone.

Starting hook: you are at the Salt Crown at dusk, and Carl is buying.

Playable Module
Levels 1 12 Sessions 24 to 30 sessions of 3 to 4 hours each

The Blood Price of Borealis

Behind the screen

DM Overview — The Blood Price of Borealis

Structure. Three regions, three acts, twelve key locations, twelve scenes. Act I (levels 1–4) is Lordinium and the northern salt road: hiring, sabotage, a heretic codex, the last port. Act II (levels 5–8) is the Ashen Reach: the burning strait, the wreck of the Penitent Star, the fog wall. Act III (levels 9–12) is Borealis itself: the strand, the Sevenfold Ruins, the Temple of the Twelve, the Ninth Terrace, the Heart.

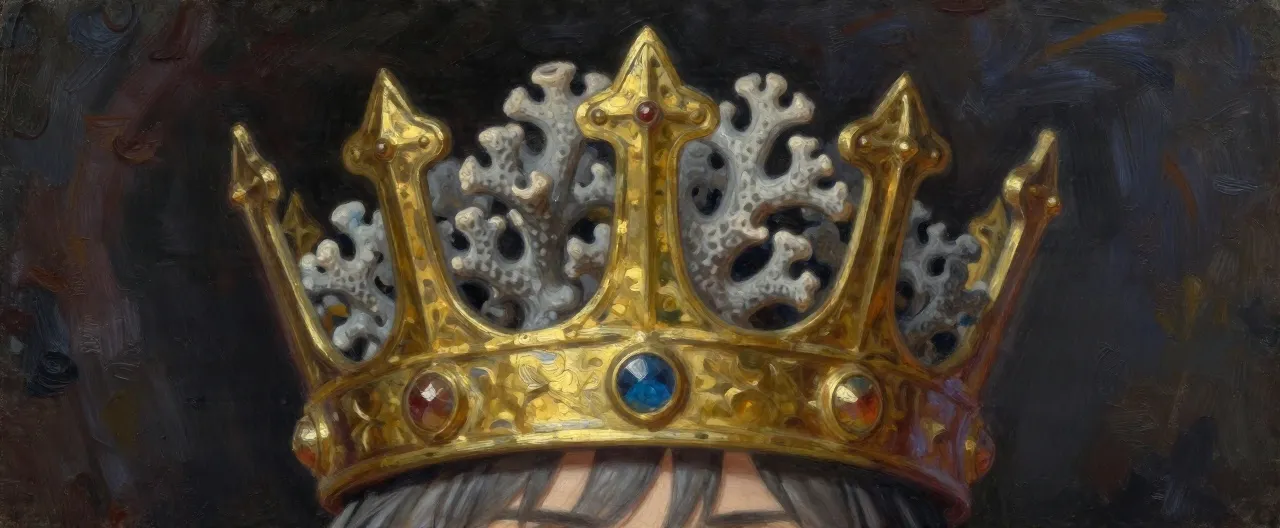
The truth. The Seven Nations did not live in harmony with the Twelve. They lived in harmony because they fed the Thirteenth. When the Thirteenth demanded a place among the Twelve, the Twelve could not destroy it — so the Seven Nations bound it beneath the island with a blood price: a continuous, hereditary sacrifice, one life every turning of the moon, drawn from the families of the Seven. The paradise was built on that altar. The Twelve accepted the bargain and let the scriptures be rewritten. The warning about the blood price was scraped from every official copy; only heretic codices kept it.

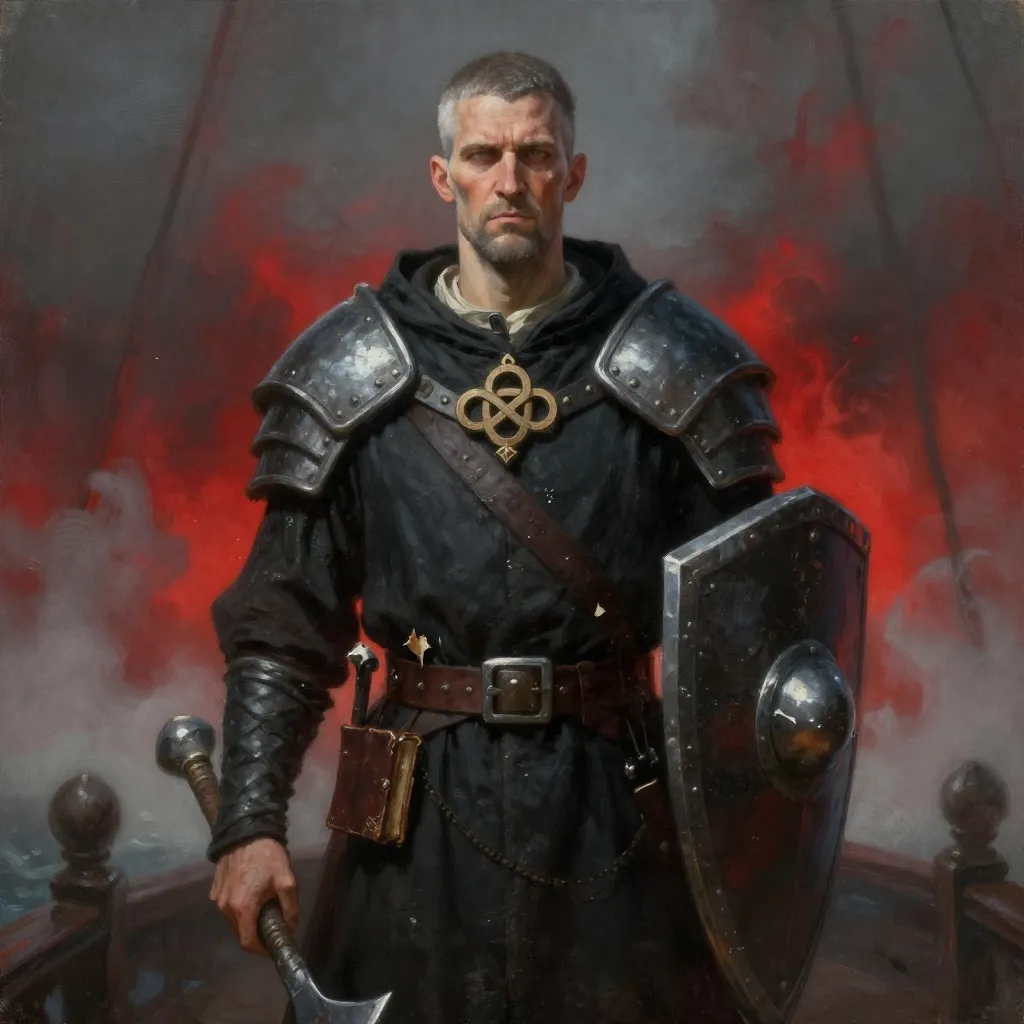
The present. The bloodline has thinned. The last offerings are gone, the altar is dry, and the Thirteenth is waking. Maelis Vane, sole survivor of the first expedition, was saved by the god and now leads the Ash Chorus to complete the price — with the party's crew as the offering. Captain Orrin Grieve wants the god's power for himself and will happily sell anyone to get it.

Clue flow. Act I plants: a scraped scripture, an ash-grey token, a heretic codex naming the Thirteenth, a priest's memory of the first expedition. Act II confirms: the Penitent Star's logbook records a crew member left behind at the fog wall, and the Warden states plainly that the fog drinks blood. Act III reveals: the strand shrine's carvings show offerings, the Sevenfold Ruins hold the sacrifice ledgers, the High Priestess confesses the binding, the Ninth Terrace shows the altar in use, and the Heart shows what it was all for.

Failure states. If the party never recovers the heretic codex, they arrive on Borealis blind and the Ash Chorus ambushes them at the strand. If they fail the Warden's trial, the fog takes a crew member as its price and the expedition arrives weakened. If Maelis completes the blood price at the Ninth Terrace, the Thirteenth rises in avatar-form at the Heart and the finale becomes a fighting retreat to the ship. If Orrin Grieve steals the chart and reaches the Heart first, he becomes the vessel instead and the final battle is against a mortal wearing a god.

Pacing. Sessions 1–3 Lordinium and docks. 4–6 Gullclaw Cay and Harrowgate. 7–10 the strait and the wreck. 11–13 the fog wall and the strand. 14–18 the ruins and the temple. 19–24 the terrace and the Heart. Use the sea voyages for downtime, crew scenes and side quests.

Villain plan. Maelis works through the Ash Chorus: she sabotaged the Sea-Devil's Due in Lordinium, she has a Chorus cell at Gullclaw Cay, and she has been at the Heart for a year preparing the altar. Orrin Grieve shadows the expedition, hoping the party clears the way. The Thirteenth does nothing directly until the altar is fed; it whispers, it bargains, and it waits.
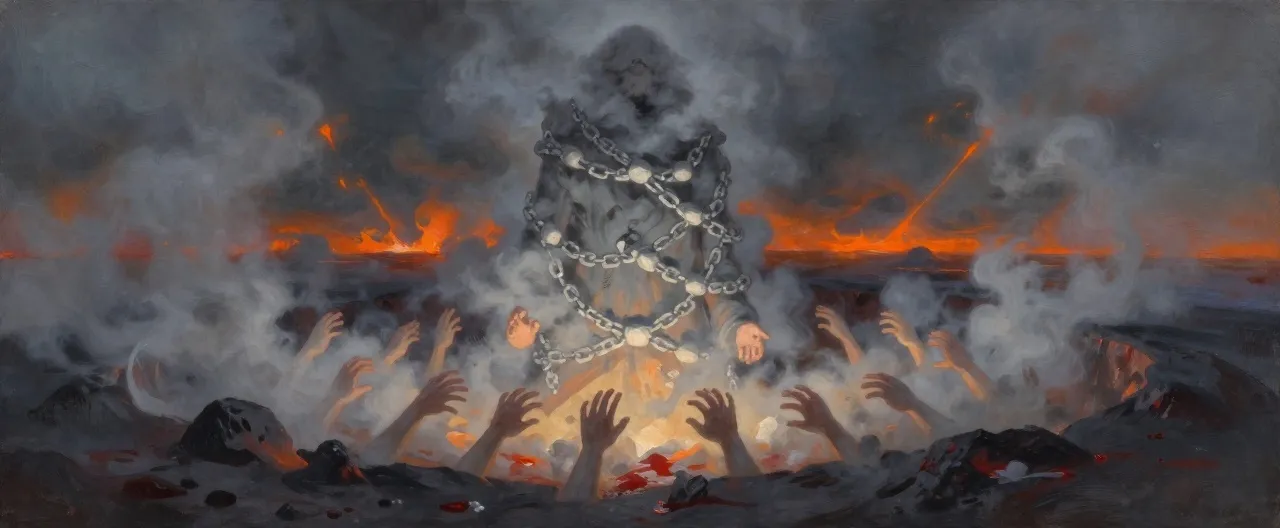
Adventure Hooks

Hook 01

Forty Gold and a Share

A sealed letter with the crown-and-wave of Lordinium arrives for each of you: Carl of the Seven Seas needs hands for a voyage north, forty gold on signing, a full share on return. Present yourself at the Salt Crown on the harbour front at dusk and ask for Halda. This is the default hook and puts the party at the first scene with coin already promised.

Hook 02

The Third Voyage

A dockmate, a creditor, or a shrine priest tells the party that Carl's last three crews did not come home and that the Crown has quietly stopped licensing his hulls. Signing on is the only way to find out what happened to a missing relative — a sibling, a parent, a friend — whose name is on the lost list in Harrowgate shrine.

Hook 03

The Scraped Line

A scholar, copyist, or acolyte contact shows the party a page of official scripture with a line cut out of it and a heretic copy that still carries the words. Carl's expedition is the only way north to prove what was erased. This hook ties the party to Archivist Venn and to the codex hunt in Act I.

Hook 04

The Grey Collector

A grey-robed charity collector has been asking after the party by name in the taverns along the harbour front, offering good coin for them to leave Lordinium and forget the north. Taking Carl's offer is the fastest way to find out why the Ash Chorus does not want them aboard.

Hook 05

The Debt at the Dry Dock

One of the party owes the Tidewrights' Guild money, and the Guild has offered to wipe the debt for a season's work aboard a licensed hull. The hull is the Sea-Devil's Due, and the Guild's factor wants a quiet report on what Carl finds in the north.

Act Structure

Act I — The Hiring of the Sea-Devil's Due

Recommended level: 1–4

Carl of the Seven Seas hires the party in Lordinium. Before the ship can sail, the party must survive sabotage, buy a heretic codex that still carries the erased warning, and win the last northern port's permission to leave. The act ends when the Sea-Devil's Due clears Harrowgate and turns into the smoking sea.

Objectives

  • Sign on with Carl's expedition at the Salt Crown.
  • Find and stop whoever is cutting the Sea-Devil's Due's hull.
  • Recover the heretic codex from the sea cave under Gullclaw light.
  • Win Captain Verity Kane's licence at Harrowgate and learn what Priest Aldous knows of the warning.

The Salt Crown Commission

The Salt Crown, a lamplit tavern on Lordinium's harbour front, at a long table by the fire

Read aloud

The Salt Crown smells of tar, onions and wet wool. At the long table by the fire a big man in a salt-stained coat is standing on a bench, telling forty strangers about a sea that burns. He sees you and grins like a man who has already spent your share. Carl of the Seven Seas waves you over. Sit down. He is buying.

Running this scene

Carl presents the torn chart, the fog, the burning sea and the promise of a full share. He is honest about the danger and evasive about the scripture. A grey-robed collector watches from the door and leaves if challenged. Halda Storm is at the bar and will size the party up. This scene sets the tone: a treasure voyage with a cold hand on its shoulder.

Checks
  • Insight DC 13: Carl is hiding something about the scripture's warning; he looks away when he says copying error.
  • Perception DC 12: a grey-robed figure at the door has been watching the table for an hour and leaves when noticed.
  • History DC 14: Borealis is the legendary homeland of the Seven Nations, and every account of it ends with a warning about a return.
  • Persuasion DC 13: Carl raises the signing fee from forty gold to sixty, or throws in a healing potion for the whole party.
  • Investigation DC 12: the torn corner of Carl's chart matches a page torn from a bound book, not a map.
Clues
  • Carl's chart is torn along a line of text, not along a coastline.
  • The grey-robed watcher drops an ash-grey token stamped with a circle of thirteen dots.
  • Carl admits the scripture's warning was mostly rotted away and he did not think it worth translating.
  • Halda Storm mutters that four of Carl's crews have not come home and this one will be the fifth.
Where next
  • Halda Storm takes the party down to the dry dock to inspect the Sea-Devil's Due before dawn.
  • Archivist Venn can be found at the castle library if the party asks about the scripture.
  • Obb the Quartermaster is drinking in the corner and will sell the party anything, including a heretic codex.

The Sabotaged Keel

The dry dock cradle beneath the Sea-Devil's Due, lit by cressets, with the tide due in six hours

Read aloud

Halda Storm holds a lantern against the ship's flank and shows you four clean cuts in the new copper, each one an arm's length, each one angled so the hull will open the moment she takes a heavy sea. Six hours to the tide, she says. Find me the bastard who did this, or we sail with a sieve.

Running this scene

The cuts are fresh, made with a caulker's knife from inside the dock. Sedge the caulker is the Chorus agent and will try to blame a dockhand. Jory Tallow is the actual saboteur and is hiding in the sail loft. If confronted kindly, Jory breaks and confesses everything, including the safe channel through the smoking strait. If threatened, he bolts for the harbour and must be caught.

Checks
  • Investigation DC 14: the cuts were made from inside the cradle by someone who knew the tide schedule, not by a stranger.
  • Perception DC 13: fresh ash-grey wax on the cradle strut, the kind Chorus couriers use to seal letters.
  • Stealth DC 13: approach the sail loft without alerting Jory, who is packing a bag.
  • Athletics DC 12: catch Jory if he bolts along the quay.
  • Persuasion DC 14 or Intimidation DC 15: get Jory to confess and name the Chorus.
  • Insight DC 12: Sedge the caulker is too eager to blame the dockhands.
Clues
  • A Tidewrights' Guild chit in Jory's bag, made out to a woman named Maelis.
  • Jory was given a safe channel through the smoking strait and a purse of old coin.
  • Sedge wears a grey cord under his apron, the mark of the Ash Chorus.
  • The cuts are designed to open the hull in heavy weather, not to sink the ship at dock — someone wants the crew alive until the fog.
Where next
  • With the hull repaired, the Sea-Devil's Due sails for Gullclaw Cay to take on oil and a pilot.
  • Jory's safe channel gives the party an advantage in the smoking strait later.
  • Obb can be pressed for the heretic codex he is holding.

The Erased Verse

A sea cave under the Gullclaw light, dry at low tide, stacked with oilcloth crates and lit by a single lantern

Read aloud

Tamsin Quill unlocks the third lock and lifts an oilcloth parcel from a crate of brandy. This is what you want, she says. A codex of the Twelve, copied before the Crown got careful. She unwraps it and there, in the margin of the creation account, is a line scraped out of every official scripture you have ever seen: and the price of return shall be blood. Then the gulls outside go silent.

Running this scene

The codex is genuine and carries the full blood-price warning plus the first mention of the Thirteenth. Tamsin wants two hundred gold or a favour. A Chorus cell of four cultists and a priest arrives by the low-tide entrance to burn the cave and take the book. Tamsin fights poorly and hides well. If the party loses the codex, Archivist Venn can reconstruct part of it later, but they lose the strongest early clue.

Checks
  • Investigation DC 13: the codex's scraped margin still shows the ghost of the original letters under the lamp.
  • Religion DC 14: the codex names a Thirteenth power that the Twelve bound beneath the earth, which no official scripture admits.
  • Perception DC 14: hear the Chorus landing on the shingle before they reach the cave mouth.
  • Stealth DC 13: slip out the low-tide entrance and take the codex with you.
  • Persuasion DC 15: talk Tamsin down from two hundred gold to one hundred and a share of the salvage.
Clues
  • The full warning: any return to Borealis shall incur a price of blood on those who return.
  • The Thirteenth demanded a seat among the Twelve and was bound, not slain.
  • A marginal note lists offerings by family: seven names, repeated down the centuries.
  • Tamsin's grey-robed buyer paid in coin stamped with thirteen dots and asked the way to the Ninth Terrace.
Where next
  • The Sea-Devil's Due sails north for Harrowgate with the codex aboard.
  • Odran asks the party to look for Ottilie's name in the Penitent Star's log.
  • Tamsin can be pressed for the name of the grey-robed buyer: Maelis.

The Last Port Sermon

The shrine of the Twelve at Harrowgate, cold stone and a hundred memorial candles

Read aloud

The shrine is colder inside than out. A hundred candles burn in front of a hundred names, and Priest Aldous adds another while you watch. He does not turn around. You have read the codex, he says. I can tell by your faces. My predecessor read it too, and he came back from the north alone, and he screamed about a price for three days before he died.

Running this scene

Aldous has his predecessor's journal, which describes the fog wall and the words that open it. He will give it up if the party agrees to bring the northern dead home. Captain Kane is at the Grey Gull and will grant the licence only if the party clears the Chorus cell in the burned warehouse. The cell is four cultists and a priest, and it has a hostage: Greta's brother, the Guild courier.

Checks
  • Persuasion DC 14: convince Aldous to hand over the journal without a promise the party cannot keep.
  • Religion DC 13: recognise that the shrine's memorial list is ordered by family, and the same seven family names repeat down the centuries.
  • Investigation DC 14: the burned warehouse was set from the inside, and the fire did not reach the cellar.
  • Intimidation DC 15 or Persuasion DC 16: get Captain Kane to admit her boats were taken, not lost.
  • Stealth DC 13: approach the burned warehouse without being seen by the grey-robed watcher on the quay.
Clues
  • The fog wall opens for a price paid in blood, and the words that open it are in the journal.
  • The first expedition's only survivor was a woman named Maelis Vane.
  • The seven family names in the shrine register are the same seven in the codex's margin.
  • The Chorus cell in the warehouse is holding a Guild courier and a crate of charts.
Where next
  • With Kane's licence and Aldous's journal, the Sea-Devil's Due sails into the smoking sea.
  • Freeing the courier earns Greta's information and the Guild's goodwill.
  • The journal names the fog gate and the Warden who keeps it.

Milestone: The party reaches level 5 when the Sea-Devil's Due leaves Harrowgate harbour and the burning sea comes into sight.

Act II — The Smoking Sea

Recommended level: 5–8

The Sea-Devil's Due crosses the burning strait, finds the wreck of the first expedition, and reaches the fog wall. The party learns that the fog demands a life and that Maelis Vane has been here before them. The act ends when the gate opens and the island of Borealis appears out of the fog.

Objectives

  • Navigate the smoking strait without losing the ship.
  • Board the wreck of the Penitent Star and rescue any survivors.
  • Learn the fog wall's price and pass the Warden's trial.
  • Reach the shore of Borealis with the crew intact.

The Smoking Strait

The deck of the Sea-Devil's Due, in the burning strait, smoke thick enough to taste

Read aloud

The smoke closes over the sun and the sea begins to glow. Jory Tallow is at the bow with his astrolabe, shouting bearings that do not match the chart, and Halda Storm is at the wheel with a wet cloth over her face. A shoal of burning water opens ahead of the ship, and the water around it is full of shapes that are not fish.

Running this scene

This is a three-stage skill challenge: find the channel, hold the channel, survive the night. Each stage needs two successful checks from the party. Failure costs 1d6 crew, 2d10 hull damage, or a delay that lets Orrin Grieve's Widow's Due close in. The shapes in the water are drowned members of the first expedition, now twisted; they do not attack unless the ship stops.

Checks
  • Wisdom (Survival) DC 15: read the smoke and the glow to find the safe channel.
  • Dexterity (navigator's tools) DC 14: hold the channel through a shifting shoal.
  • Constitution saving throw DC 13: work the deck through the smoke without exhaustion.
  • Strength (Athletics) DC 13: haul a crew member out of the burning water before it takes them.
  • Perception DC 15: spot the wreck of the Penitent Star through the smoke on the third day.
Clues
  • The burning water glows brighter where the channel runs, not dimmer.
  • The drowned shapes in the water wear the colours of the first expedition.
  • A black basalt arch is visible through the smoke ahead, with a figure standing on it.
  • Orrin Grieve's Widow's Due is following two miles astern and making no effort to hide.
Where next
  • The wreck of the Penitent Star is sighted on the third day and can be boarded.
  • The fog wall and the basalt arch come into view on the fifth day.
  • Orrin Grieve hails the ship and offers to trade charts.

The Penitent Star

The broken stern of the Penitent Star, under a sailcloth awning, with the sea washing through the hold below

Read aloud

The wreck leans out of the water like a broken tooth. Carl goes very quiet when he sees the name on her stern. There is a sailcloth awning rigged over the quarterdeck, and under it a woman is standing with a boat hook, thin as rope, watching you come. She does not wave. She has stopped expecting anyone to come.

Running this scene

Elspeth is alive, wary and entirely sane. She has the logbook and will trade it for passage off the reef. The flooded hold holds the strongbox and two drowned crew who have been twisted by the water and will attack anyone who enters. If the party tells Elspeth her sister is alive, she goes very still and then asks to come with them.

Checks
  • Persuasion DC 13: convince Elspeth the party is not another Chorus ship.
  • Investigation DC 14: find the logbook's entry about the fog wall's price in the water-damaged pages.
  • Athletics DC 14: dive into the flooded hold and bring up the strongbox.
  • Perception DC 13: notice the drowned crew in the hold are moving before they attack.
  • Insight DC 12: Elspeth is telling the truth about being left behind, and it is costing her to say it.
Clues
  • The logbook: the fog demanded one life, and Maelis Vane chose her sister Elspeth.
  • The first expedition reached the island and found the terraces and the altar.
  • The strongbox holds a Chorus reliquary and a map of the island's nine terraces.
  • Elspeth says the fog spoke to Maelis by name and called her Crowned Vessel.
Where next
  • Elspeth joins the ship and can be questioned at length about her sister and the island.
  • The terrace map gives the party a route inland once they land.
  • The fog wall is a day's sail north.

The Fogwall Trial

The black basalt arch before the fog wall, on flat grey water, with the Warden standing above

Read aloud

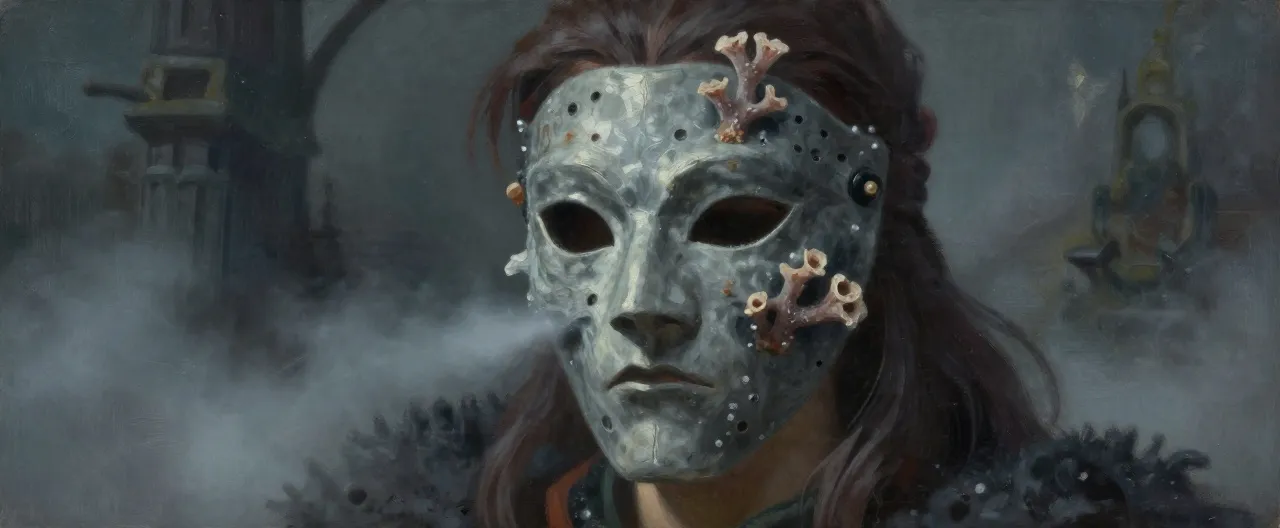
The fog does not move. The arch does. The figure on it turns its coral mask down toward your deck and speaks in a voice like a rope through a block. One life, it says. That is the price. It has always been the price. The fog will take it from your crew, or you will give it a name, and the name must be true.

Running this scene

Cassian is not hostile unless attacked. He explains the price plainly: the fog takes one life from every ship, chosen by the fog, unless someone gives it a true name freely. A true name means a name the giver has never spoken falsely — their own, or a dead crew member's, or a name they have carried in secret. If the party gives a false name, the fog takes two. If they fight Cassian, he is a dangerous opponent and the fog takes a life anyway.

Checks
  • Insight DC 15: Cassian is not lying about the price, and he is desperately hoping someone will give him his own name back.
  • History DC 16: the Warden's coat is the first expedition's uniform, thirty years out of date.
  • Persuasion DC 16: get Cassian to say his own name, which breaks the fog's hold on him and opens the gate for free.
  • Arcana DC 15: the fog is a binding, not a weather, and it is anchored to the arch.
  • Deception DC 18: give a false name and survive the fog's response.
Clues
  • The fog takes one life from every ship, chosen by the fog, not by the captain.
  • Cassian's own name is the key to the gate, and he cannot remember it.
  • The fog remembers Maelis Vane and calls her Crowned Vessel.
  • The arch is carved with thirteen figures, and the thirteenth has been chiselled away.
Where next
  • The gate opens and the Sea-Devil's Due sails through into green water.
  • Cassian, freed, can be taken aboard as a guide to the island.
  • The island of Borealis appears out of the fog.

Milestone: The party reaches level 9 when the fog parts and the green shore of Borealis comes into view.

Act III — The Paradise of the Price

Recommended level: 9–12

The party lands on Borealis, crosses the forest to the Sevenfold Ruins, learns the truth of the blood price from the last scribe and the last high priestess, descends to the Ninth Terrace to break the altar, and faces Maelis Vane and the Thirteenth at the Heart of the island. The act ends when the party decides the god's fate.

Objectives

  • Land on the strand and cleanse the shrine that twists the island's creatures.
  • Reach the Sevenfold Ruins and read the sacrifice ledgers.
  • Learn from the High Priestess how the Thirteenth was bound and what it cost.
  • Destroy the blood-price altar at the Ninth Terrace and free Nesa.
  • Confront Maelis Vane and the Thirteenth at the Heart of Borealis.

The Strand of Bones

The white beach and the overgrown shrine at its north end, with the forest wall behind

Read aloud

The beach is white and the bones are white and it takes you a moment to understand that the beach is made of bones. At the north end a small shrine stands half in the forest, its carvings chiselled blank, and something is moving inside it. A young woman with a splinted arm comes out of the rocks with a boat hook and says, very fast, do not go in there, that is what made the crabs into that.

Running this scene

Miri Salt has been on the strand for three months and knows the creatures' patterns. The shrine is a Chorus altar with a priest and two cultists maintaining it; they have been feeding the forest for a year. Destroying the altar stops new creatures from being made but does not cure the ones already twisted. The altar holds a Chorus ledger naming Maelis Vane and the Ninth Terrace.

Checks
  • Perception DC 14: the shrine's carvings were chiselled away recently, not centuries ago.
  • Religion DC 15: the shrine's arrangement is Chorus, not orthodox; the thirteen-dot circle is cut into the altar stone.
  • Stealth DC 14: approach the shrine without alerting the priest inside.
  • Arcana DC 15: the altar is a conduit, and destroying it will break the twisting but release a wave of stored energy.
  • Survival DC 13: track the twisted creatures back to the shrine and learn their patterns.
Clues
  • The shrine is a Chorus altar, and it has been here a year.
  • A ledger names Maelis Vane as Crowned Vessel and lists the Ninth Terrace as the true altar.
  • The twisted creatures were made, not born; the altar is the source.
  • Miri Salt was left ashore by Captain Orrin Grieve, who is on the island.
Where next
  • Miri guides the party inland toward the Sevenfold Ruins.
  • The Chorus ledger points to the Ninth Terrace.
  • Orrin Grieve's camp can be found on the cliffs above the strand.

The Sevenfold Ruins

The archive in the fourth ring of the ruins, a round room of stone shelves and a lectern that has not held a book in a thousand years

Read aloud

The archive is a round room of empty shelves, and at the centre an old man in temple robes is bent over a stone lectern, writing on nothing. He is translucent and he does not stop writing when you come in. He says, without looking up, you are the first people to come here in a thousand years who are not grey. Please tell me you have come to burn the ledgers.

Running this scene

Ulric is a record that refuses to stop being kept. He wrote the sacrifice ledgers and has been trying to erase them ever since. He will tell the party the truth about the blood price if asked plainly, and he will lie about it if asked as a priest of the Twelve. The ledgers are in a locked stone cabinet; the Chorus wants them destroyed and will attack the archive to do it.

Checks
  • Investigation DC 15: find the hidden cabinet behind the empty shelves.
  • History DC 16: the ledgers record one offering every turning of the moon for a thousand years, drawn from seven named families.
  • Persuasion DC 14: get Ulric to tell the truth about the Twelve's role in the binding.
  • Religion DC 15: the chiselled faces were destroyed by the city's own people, in shame, not by invaders.
  • Arcana DC 16: the ledgers are bound with the same magic as the altar, and burning them weakens the Thirteenth.
Clues
  • The blood price was one life every turning of the moon, from seven hereditary families.
  • The Twelve knew and allowed it; the scriptures were rewritten to hide it.
  • The last of the seven families is Nesa of the Ninth Terrace.
  • The Thirteenth is not dead; it is bound, and the binding is failing.
Where next
  • Ulric points the party to the Temple of the Twelve and the High Priestess.
  • The ledgers can be burned to weaken the Thirteenth, or kept as evidence.
  • The Chorus attacks the archive if it learns the party has the ledgers.

The Temple of the Twelve

The inner sanctum of the temple, twelve shrines and one empty niche, a stone throne and a woman of stone and gold leaf

Read aloud

The woman on the throne opens her eyes and they are entirely black. She says, in a voice like a dry leaf, you have read the ledgers. Good. I will not waste your time with the version we told the children. The Twelve could not kill it. So we bought it. Every moon, one life, from seven families, forever. And the Twelve called it harmony, and we called it paradise, and I have had a thousand years to think about the word we should have used.

Running this scene

Senna confesses everything without being pressed. She knows the ritual to re-bind the Thirteenth and the price it demands. She will not pretend the price is small. She also knows that the altar at the Ninth Terrace is dry and that Maelis Vane is trying to feed it. The undercroft behind the throne leads down to the terraces.

Checks
  • Insight DC 15: Senna is telling the truth and is not trying to manipulate the party.
  • Religion DC 16: the ritual she describes is a binding, not a banishment, and it can be repeated.
  • Arcana DC 17: the thirteenth niche was chiselled out by the Twelve's own priests, not by the Chorus.
  • Persuasion DC 15: get Senna to admit there may be another way, though she does not know what it is.
  • Investigation DC 14: the undercroft door behind the throne is open and has been used recently.
Clues
  • The Twelve could not kill the Thirteenth and chose to bind it instead.
  • The binding required freely given blood from the Seven Nations, one life every moon.
  • The ritual can be repeated, and it needs a volunteer of the old bloodline.
  • Maelis Vane has been in the undercroft within the last month.
Where next
  • The undercroft leads down to the Ninth Terrace.
  • Senna can be brought along as a guide, though she cannot leave the temple far.
  • The party must decide whether to re-bind the Thirteenth or find another way.

The Ninth Terrace

The ninth terrace beneath the temple, a circular pit of black stone, nine pillars, an altar and a chained woman

Read aloud

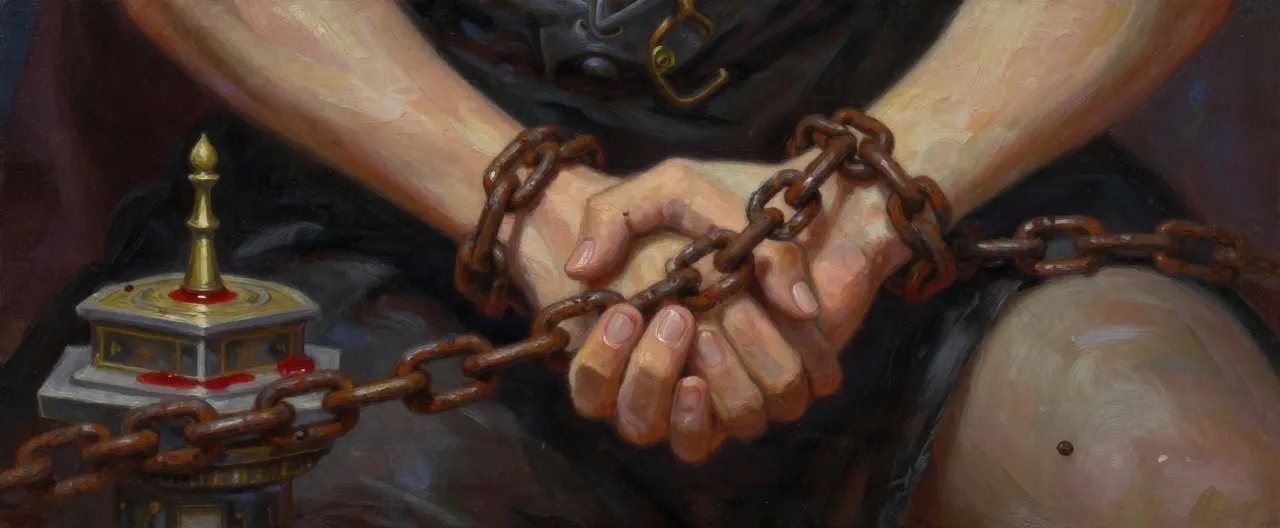
The stairs end in a pit of black stone. Nine pillars stand around an altar that has been polished by a thousand years of use, and chains are set into the floor around it. A young woman in a white shift is chained to the tallest pillar, and she looks at you with the patience of someone who has been waiting a very long time. Behind her, grey-robed figures are unrolling a long canvas shroud.

Running this scene

The Chorus is preparing the altar for the expedition's crew. A priest and four cultists guard it; Maelis is at the Heart. Nesa can tell the party when the Thirteenth is lying and knows the altar's weak point. Breaking the altar requires three successful actions while the Chorus fights to stop them. If the party fails, the Chorus completes the offering and the Thirteenth begins to rise.

Checks
  • Athletics DC 15: break one of the nine pillars supporting the altar's binding.
  • Arcana DC 16: find the altar's weak point, which is the drain, not the table.
  • Religion DC 15: speak the words of the Twelve over the altar to weaken it.
  • Persuasion DC 14: get Nesa to tell you what the Thirteenth has been saying to her.
  • Stealth DC 15: reach the altar before the Chorus finishes the shroud.
Clues
  • The altar is dry because Maelis is saving the price for one great offering.
  • Nesa is the last of the seven families and the only offering the altar recognises.
  • The Thirteenth speaks to Nesa constantly and calls her the last coin.
  • Breaking the altar opens a shaft down to the Heart.
Where next
  • The broken altar opens a shaft down to the Heart of Borealis.
  • Nesa joins the party as a guide and a volunteer.
  • Maelis Vane is waiting at the Heart with the Chorus's inner circle.

The Heart of Borealis

The floor of the black crater at the island's heart, before the bound Thirteenth, with Maelis Vane and the Chorus's inner circle

Read aloud

The crater floor is warm and the chains of white stone are loose around a shape that is mostly fog and hands. Maelis Vane stands at the edge with her grey priests, and she smiles when she sees you, and she says, you came. Good. I did not want to do this without witnesses. The Thirteenth has been waiting a thousand years for someone to finish the price, and I have brought it a crew.

Running this scene

Maelis offers the party a place in the Chorus, sincerely, and will let them walk away if they agree to leave the crew. If refused, she and the inner circle fight while the Thirteenth bargains with individual characters. The Thirteenth offers each character the one thing they want most for a single drop of blood freely given. If the party has broken the altar, the Thirteenth is weakened and can be destroyed. If not, it rises in avatar-form. Nesa can re-bind it at the cost of her life, or the party can find another way.

Checks
  • Persuasion DC 18: turn Maelis by telling her Elspeth is alive and that the Thirteenth has been lying about ending death.
  • Arcana DC 17: use the broken altar's power to scatter the bound blood and destroy the Thirteenth.
  • Religion DC 16: perform the re-binding ritual with Nesa as the volunteer.
  • Insight DC 16: the Thirteenth is bargaining in good faith and will keep any promise it makes.
  • Charisma saving throw DC 17: resist the Thirteenth's offer of your heart's desire.
Clues
  • The Thirteenth has been lying to Maelis: it cannot end death, only feed on it.
  • Elspeth Vane's survival is the one thing that can shake Maelis's certainty.
  • Nesa is willing to die to re-bind the god, and the ritual will work.
  • The Thirteenth will keep any bargain it makes, exactly, and no more.
Where next
  • If the Thirteenth is destroyed, the fog lifts and the island begins to die.
  • If it is re-bound, the fog stays and the price begins again, with Nesa as the last offering.
  • If it is bargained with, the party leaves with a new compact and a god awake behind them.

Milestone: The party reaches level 12 when the altar at the Ninth Terrace is broken and the way to the Heart opens.

Monsters & Enemies

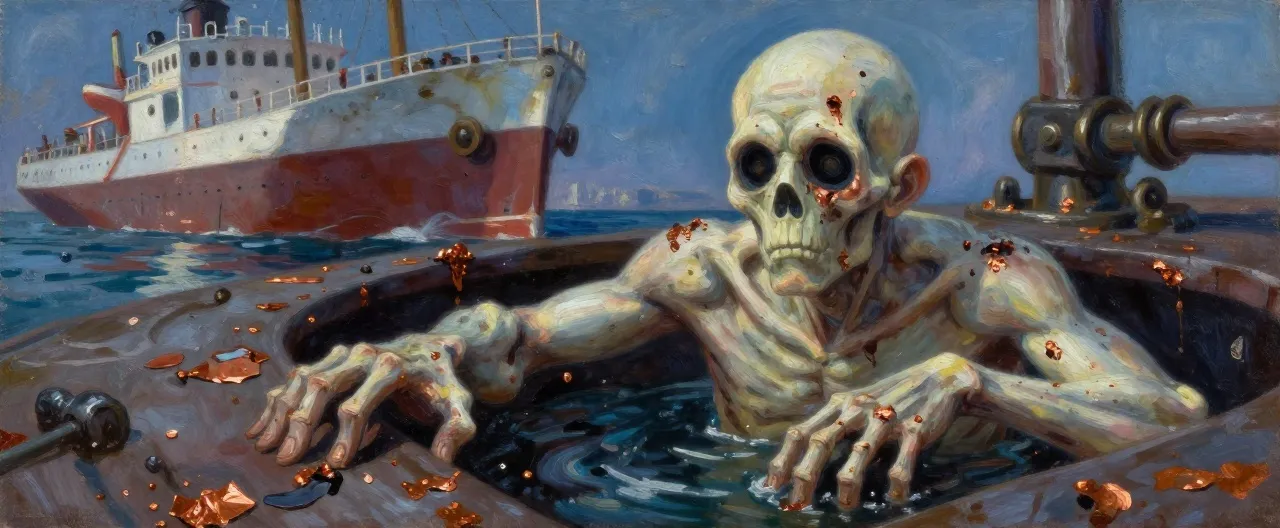
Bilge Hull-Ghoul Bilge Hull-Ghoul Completed · CR 1/2 · Undead

Bloated pale undead dockworker crusted with copper filings and black tar, hollow eyes, bony fingertips, crouched in dark bilge water beneat…

Shriek Gull Shriek Gull Completed · CR 1/4 · Beast

A grey-and-white gull with a hooked beak and one clouded eye, perched on jagged coastal rocks.

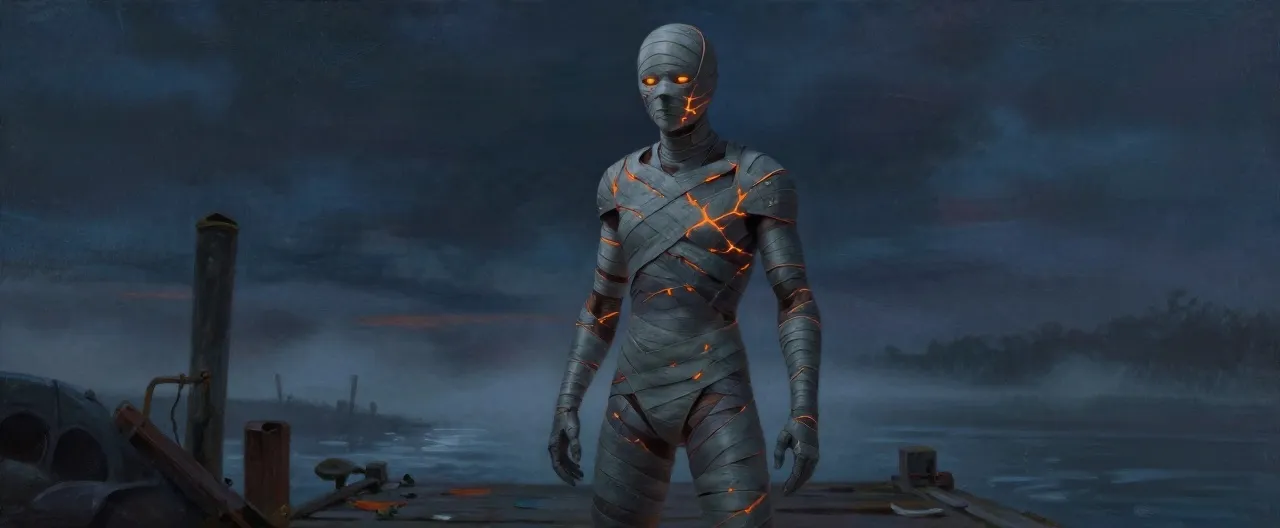
Ash-Wrapped Penitent Ash-Wrapped Penitent Completed · CR 2 · Humanoid

A gaunt humanoid wrapped head to toe in grey, dripping bandages, ember-orange cracks glowing through the seams, standing on a foggy dock at…

Emberfin Drowned Emberfin Drowned Completed · CR 3 · Undead

Iron-grey drowned sailor with glowing orange seams, cinder hair, and black glass hooked fingers, lurking in burning water or a flooded ship…

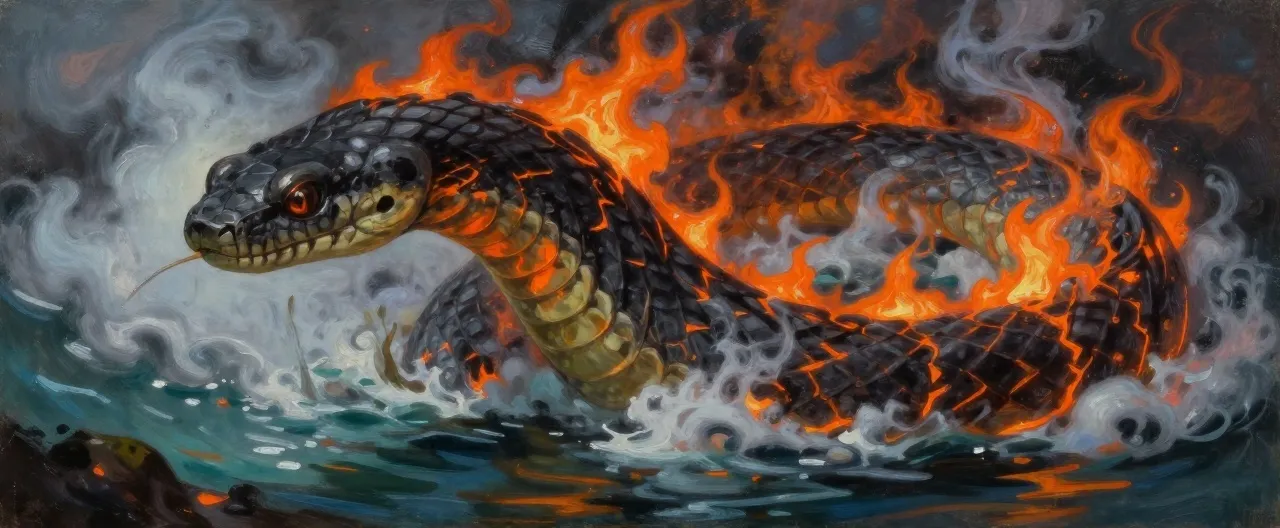
Smoke-Shoal Serpent Smoke-Shoal Serpent Completed · CR 5 · Monstrosity

A huge eel-headed serpent with black basalt scales veined in glowing orange heat, coiling through scalding smoke and burning shoal water, f…

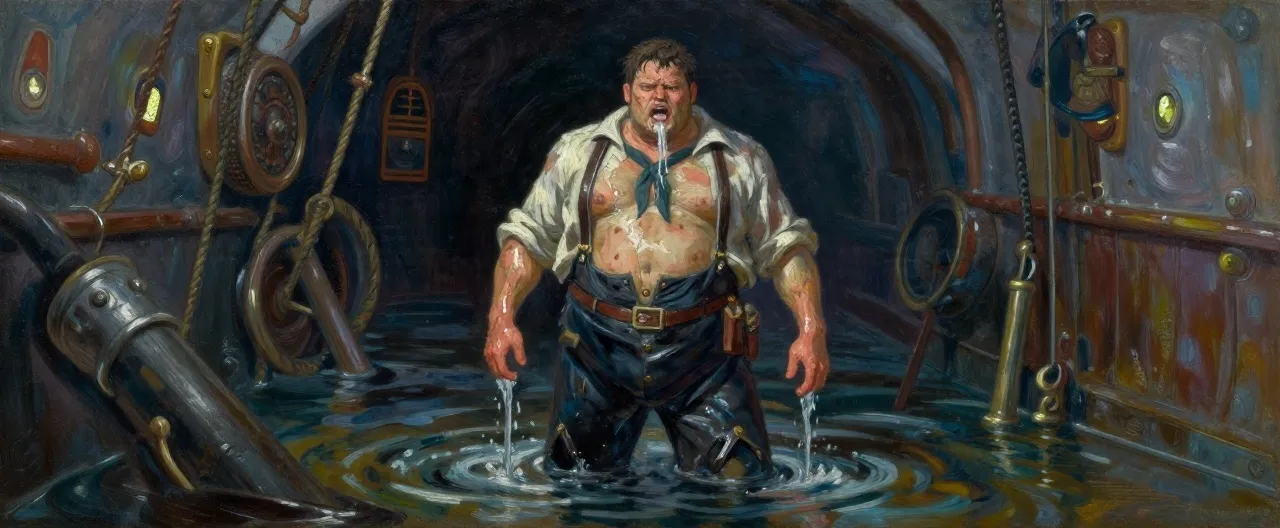
Brine-Swollen Deckhand Brine-Swollen Deckhand Completed · CR 2 · Undead

A bloated drowned sailor in rotted uniform, skin grey and waterlogged, seawater spilling from its mouth, standing knee-deep in a flooded, d…

Fog-Bleeding Shade Fog-Bleeding Shade Completed · CR 4 · Undead

A tall, thin silhouette of grey mist with a red seam across its throat, dripping a single drop of blood, drifting over a foggy strand of bo…

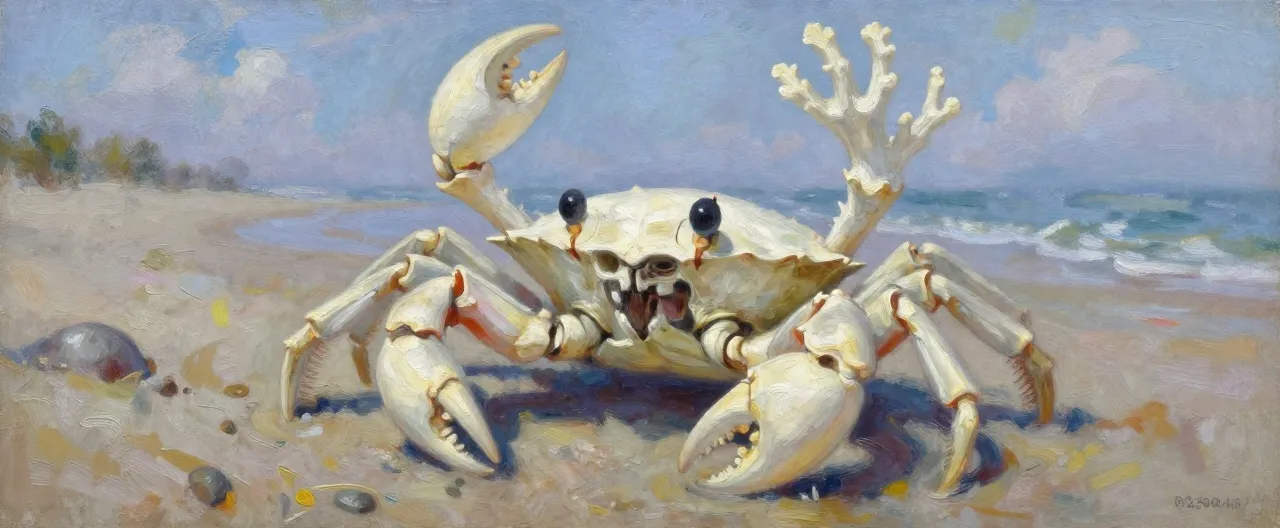
Coral-Antlered Strand Crab Coral-Antlered Strand Crab Completed · CR 2 · Beast

A pony-sized bone-white crab on a beach of skeletons, crowned with branching white coral antlers, one oversized claw raised, stalked eyes t…

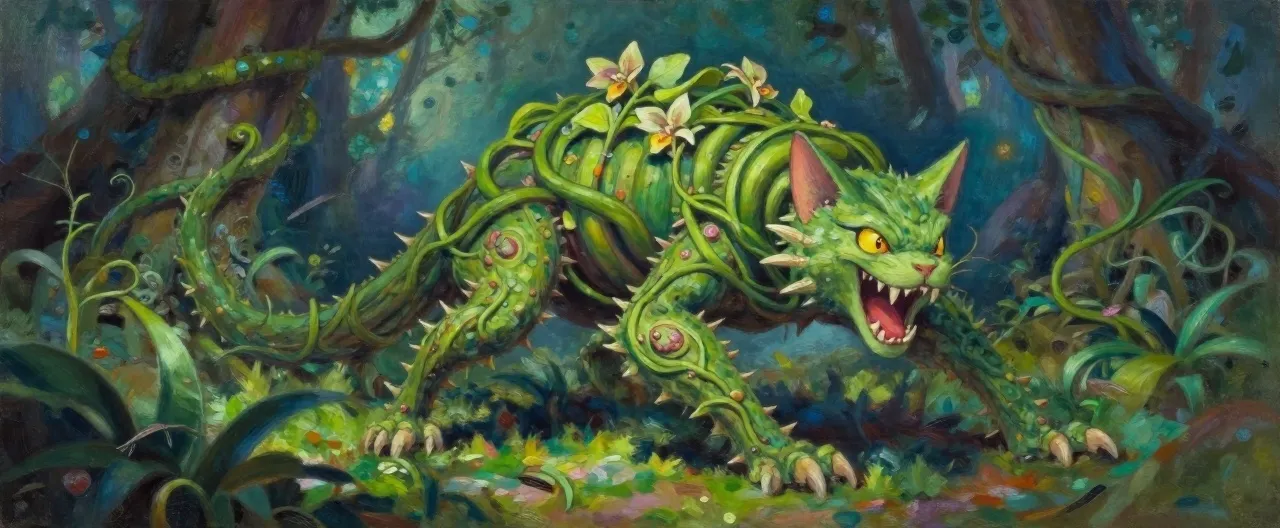
Orchid-Maw Stalker Orchid-Maw Stalker Completed · CR 6 · Plant

A large predatory plant-cat of tangled green vines and orchid blooms, six thorned legs, and a flower head opening into a ring of teeth, cro…

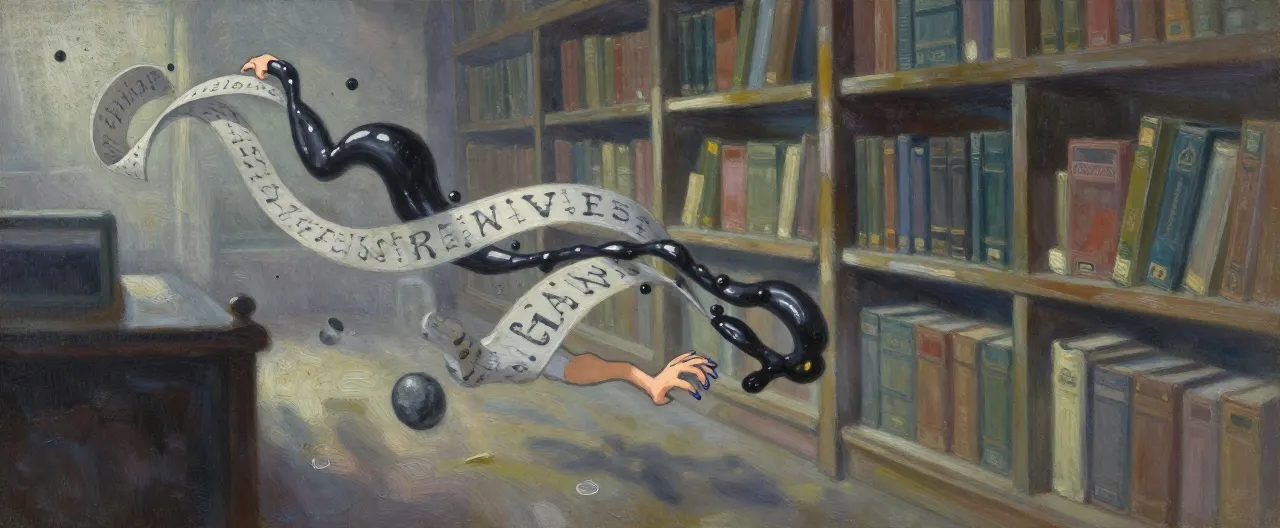
Ink-Wisp of the Archive Ink-Wisp of the Archive Completed · CR 3 · Construct

A floating knot of glossy black ink and grey stone dust, trailing written script, half-formed into letters and grasping hands, drifting amo…

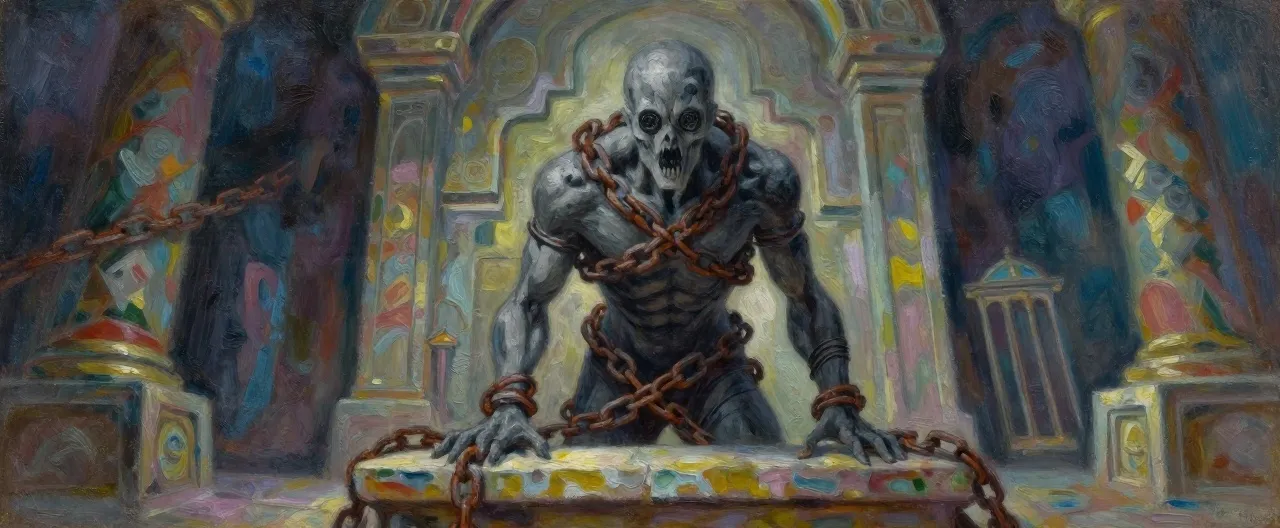
Chain-Choked Offering Chain-Choked Offering Completed · CR 6 · Undead

A gaunt, grey undead wrapped in rusted chains, eyes like black coins, standing on a stone altar in a dim temple terrace.

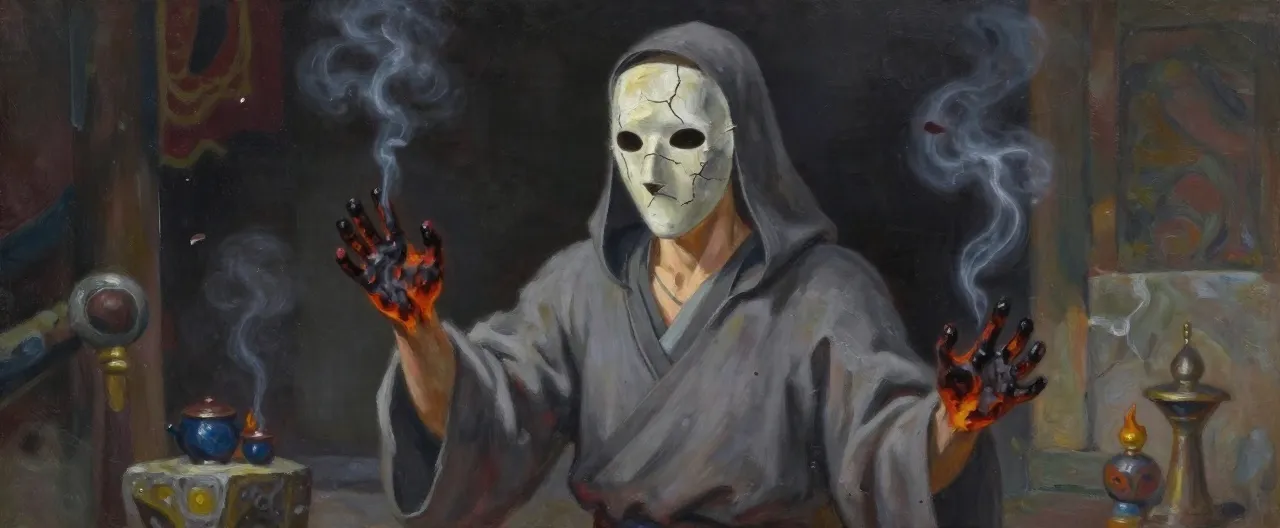
Ash-Handed Chorister Ash-Handed Chorister Completed · CR 8 · Humanoid

A gaunt human in grey robes, hands burned black, wearing a cracked mask of ash paste. It stands amid incense in a shadowed stone terrace.

Villain Plans

The Thirteenth, the God Beneath the Fog Character Sheet

BBEG, the imprisoned god of Borealis

Motivation

It was denied a seat among the Twelve and bound beneath the island by the blood of the Seven Nations. It does not want to destroy the world; it wants to be worshipped, and it has learned that worship is bought with blood. Every offering at the Ninth Terrace loosens a chain. It wants the chains gone.

Personality

It never raises its voice. It speaks in a chorus of the voices of everyone it has ever been fed, and it is unfailingly polite. It does not lie — it offers true things at terrible prices and lets the offer do the work. Portray it as the most reasonable being in the room.

Resources

  • The Ash Chorus and its cells in every northern port
  • Maelis Vane, its Crowned Vessel
  • The fog wall, which drinks blood and answers to it
  • The twisted beasts of Borealis, which were once its offerings
  • The blood-price altar at the Ninth Terrace
  • Whispers that reach the dreams of anyone who sleeps on the island

Battle Plan

It does not fight until it must. It bargains first, offering each character the one thing they want most in exchange for a single drop of blood freely given. If refused, it lets Maelis and the Chorus do the fighting. If the altar is fed, it rises as an avatar of fog, ash and many hands: it opens with a chorus that frightens and charms, then grapples and drags characters toward the crater's edge, using the terrain and its Chorus as a screen. It retreats into the fog when reduced below a third of its hit points and returns only if the altar is fed again.

Defeat or Redemption

It can be destroyed only by breaking the altar and scattering the bound blood, which ends it permanently. It can be re-bound by a volunteer of the old bloodline — Nesa of the Ninth Terrace is willing, and the party may find another way. It can also be bargained with: a new compact, freely entered, that ends the sacrifices but leaves it awake and worshipped. All three endings are legitimate; the module's final scene asks the party to choose.

Maelis Vane, the Crowned Vessel Character Sheet

Lieutenant, leader of the Ash Chorus and the Thirteenth's chosen

Motivation

She was the only survivor of the first expedition. The fog took her crew one by one and then took her, and the Thirteenth gave her back. She believes, with the certainty of the saved, that the god will end death itself — and that any price paid now is a rounding error against eternity.

Personality

Warm, tired, and completely unshakeable. She remembers every name of every person she has ever fed to the altar and recites them like a prayer. She will share her food, mend a character's wound, and then explain calmly why the party's crew must die.

Resources

  • The Ash Chorus, whose priests obey her without question
  • The key-words that open the fog wall
  • The logbook and charts of the Penitent Star
  • Ash-grey assassins in every northern port
  • A year's head start on the island and the altar prepared

Battle Plan

She opens with control magic — holding, blinding, silencing the party's healer — while her Chorus screens her. She never stands in the front rank. If reduced below half her hit points she uses the fog to escape and rejoins the fight at the Heart. If the party tries to talk, she listens, genuinely, and offers them a place in the Chorus.

Defeat or Redemption

She can be killed, and the Chorus fractures without her. She can be turned if the party proves the Thirteenth has been lying about ending death — her sister Elspeth Vane, alive on the wreck, is the strongest lever. Redeemed, she breaks the altar herself and dies doing it.

Captain Orrin Grieve, the Drowned Compass Character Sheet

Lieutenant, rival treasure hunter and privateer

Motivation

He wants the god's power for himself. He lost his first crew to the fog and came back with nothing but a reputation, and he has decided that a man who cannot be a king of the sea will settle for being a god of an island. He blames Carl for the loss and intends to take the expedition's glory and its ship.

Personality

Loud, funny, generous with other people's money, and vicious the moment he is cornered. He calls everyone 'friend' and means it right up until he does not. He keeps a stolen Chorus priest chained in his hold and asks it for advice.

Resources

  • The Widow's Due, a fast three-masted privateer
  • A crew of forty cutthroats and one chained Ash Chorus priest
  • A stolen copy of Carl's chart
  • A letter of marque from a kingdom that no longer exists
  • Knowledge of the smoking strait's safe channels

Battle Plan

He shadows the expedition, lets it clear the fog, and strikes when the party is ashore and tired. He boards the Sea-Devil's Due, takes hostages, and offers to trade them for the chart and the codex. If forced into a fight he uses his crew as a screen, cuts the rigging to drop it on characters, and flees into the fog the moment the odds turn.

Defeat or Redemption

He can be killed, and his crew scatters. He can be bought — he will take a share of the island's treasure and sail away, though he will betray the party if the Thirteenth offers him more. He can be humiliated and left alive, which makes him a recurring nuisance in the epilogue.

Running Notes

Recommended party: Four characters of levels 1 to 12: a front-line warrior, a divine or primal healer, an arcane caster, and a rogue or ranger for scouting, locks and traps. Training in navigator's tools, Survival, History or Religion is a strong asset; a character who can breathe water or speak with the dead pays off in Act III.

Session Zero

This is a treasure-voyage campaign that turns into an excavation of a crime. Before play, tell the table plainly: the module is about human sacrifice, hereditary debt, and gods who accept a bargain. There is body horror on the island (twisted animals, drowned sailors, a god of fog and hands), and there is a scene in which a young woman has been chained above an altar for a year. None of it is graphic, but all of it is present. Use the lines-and-veils tool: ask each player for one subject they want off-screen and one they want handled with care. Establish that the party are crew, not conscripts — they can refuse an order, argue with Carl, and leave the ship, though leaving has consequences. Agree on how much player-versus-player conflict is acceptable around the mutiny subplot. Confirm the party has a healer and someone who can swim. Set the expectation that the finale is a choice, not a boss rush, and that all three endings are legitimate.

Scaling Guidance

The module is written for four characters of levels 1 to 12. For three characters, remove one non-boss combatant from each encounter roster and reduce boss hit points by a quarter. For five or six characters, add one or two combatants of the same kind already in the roster and give bosses one extra action per round. If the party is a level above the suggested range, add a second wave of the cheapest combatant in the roster at the start of round three. If they are a level below, remove the highest-CR combatant and let the encounter's hazard do the work instead. Never scale by raising a single monster's hit points alone; add bodies, terrain, or a hazard. The finale at the Heart should always be a High encounter: if the party broke the altar, remove the Thirteenth's regeneration and cut Maelis's hit points by a quarter rather than removing combatants.

DM Advice

Pace the campaign in three movements: sessions 1–3 in Lordinium and the docks, 4–6 at Gullclaw Cay and Harrowgate, 7–10 in the strait and the wreck, 11–13 at the fog wall and the strand, 14–18 in the ruins and the temple, 19–24 on the terrace and at the Heart. Plant one clue per act and never repeat it: the scraped margin in Act I, the logbook's price in Act II, the ledgers and Senna's confession in Act III. Let the players assemble the truth themselves; do not have an NPC explain the blood price before the ledgers are read. Keep three pressures running at all times: the Chorus is one step ahead, Orrin Grieve is one step behind, and the crew is watching. Carl should be likeable and present, so his private decision lands hard. Maelis should be warm and reasonable, never gloating. The Thirteenth should never raise its voice and should never lie — it offers true things at terrible prices. Use the sea voyages for downtime, crew scenes and side quests, and let the ship's morale be a visible resource. If the table is moving fast, cut a Chorus patrol; if they are moving slow, add a crew scene.

Failure States

  • If the party never recovers a heretic codex, they arrive on Borealis blind: the Ash Chorus ambushes them at the Strand of Bones with an extra priest and two cultists, and Archivist Venn's proof is lost for good.
  • If the party fails the Warden's trial at the Fogwall Gate, the fog takes a crew member of the DM's choosing and the expedition arrives on the island with a shaken crew, disadvantage on the first crew-based check, and no guide.
  • If the party never breaks the blood-price altar at the Ninth Terrace, Maelis completes the price with the expedition's crew: the Thirteenth rises in avatar-form at the Heart and the finale becomes a fighting retreat to the ship.
  • If the party loses the sacrifice ledgers to the Chorus, Ulric fades, the proof of the Twelve's role is destroyed, and the Thirteenth regains its regeneration at the Heart.
  • If Captain Orrin Grieve steals the chart and reaches the Heart first, he becomes the vessel instead of Maelis and the final battle is against a mortal wearing a god, with Maelis fighting beside the party.
  • If the party kills a Chorus priest without taking a written confession, the Thirteenth gains a bargaining chip: it can offer that priest's death as proof the price was paid, and its offers at the Heart gain advantage.
  • If the party mutinies or loses Halda Storm's trust, the Sea-Devil's Due cannot be sailed home and the epilogue becomes a long walk south along a hostile coast.

Secrets & Clues

  • The official scriptures of the Twelve in Lordinium have had the blood-price warning scraped out, and Archivist Venn has proof of it in three heretic codices.
  • The heretic codex carries the full warning: any return to Borealis shall incur a price of blood on those who return, and the Thirteenth demanded a seat among the Twelve and was bound, not slain.
  • The Penitent Star's logbook records that the fog demanded one life and that Maelis Vane chose her sister Elspeth, who is still alive on the wreck.
  • The sacrifice ledgers in the Sevenfold Ruins record one offering every turning of the moon for a thousand years, drawn from seven hereditary families, and the Twelve signed the original binding.
  • Senna, the last High Priestess, confesses that the Twelve could not kill the Thirteenth and bought it instead, and that the paradise was built on that altar.
  • Nesa of the Ninth Terrace is the last of the seven families and the only offering the altar still recognises, and the altar is dry because Maelis is saving the price for one great offering.
  • The Thirteenth has been lying to Maelis: it cannot end death, only feed on it, and Elspeth Vane's survival is the one thing that can shake her certainty.
  • The burning sea is where the Thirteenth's blood fell when the Twelve bound it, and the twisted creatures of Borealis are its old offerings, not its children.
  • Captain Orrin Grieve has a stolen copy of Carl's chart and a chained Chorus priest in his hold, and he intends to reach the Heart first and become the vessel himself.
  • The King signed the first expedition's sealed orders and knew the blood price was part of the bargain, which is why the Crown has quietly stopped licensing Carl's hulls.

Appendix

Downtime

Copying the Heretic Codex

The character spends days in a library or a ship's cabin making a careful copy of a heretic text, comparing it line by line against an official scripture. Each full day of work allows one Intelligence (Investigation) or Intelligence (History) check to spot another erased passage.

Requirements: Access to a heretic codex and an official scripture, plus calligrapher's supplies or a scribe's kit. A character trained in History, Religion or Arcana adds their proficiency bonus twice on the final check.

Rewards: A written comparison that names every scraped line. Three successful checks produce a document worth 500 gp to the right patron and enough proof to confront Archivist Venn or the Crown's clerks.

Time: Three full days of work, which can be split across sea voyages.

Location: Best done in the castle library at Lordinium with Archivist Venn, or in a cabin aboard the Sea-Devil's Due during the voyage north.

The Crown's clerks will notice a copyist working on a heretic text. On a failed check, a clerk asks questions and the character must talk their way out or lose access to the library. If the party is at sea, a failed check means ink spilled on a page and one day lost.

Sea-Burial Rites

The character performs the rites of the Twelve over the dead and commits them to the water with weights. Each rite takes an hour and requires the proper words, a weight, and a body.

Requirements: Training in Religion or Medicine, or the Acolyte background. A holy symbol or a prayer book is required; a character without one takes disadvantage on the check.

Rewards: A successful Wisdom (Religion) check DC 13 lays the dead to rest and prevents them rising as undead. Three successful rites aboard ship restore 1d4 crew morale and grant the party advantage on the next crew-based check.

Time: One hour per body, usually done at dusk.

Location: The deck of the Sea-Devil's Due, the reef around the Penitent Star, or the bone beach of the Strand of Bones.

This is the mechanical spine of Ottilie's Last Rite and of Anselm Tye's personal quest. If a rite is botched, the body rises as a *brine-swollen deckhand* at the next watch. The Chorus considers sea burial its own property and will object violently.

Guild Tally Work

The character works off a Tidewrights' Guild indenture by running crates, standing watch in a sea cave, or carrying sealed parcels between ports. Each job is a short skill challenge with a Guild factor watching.

Requirements: A Guild indenture or a factor's favour. A character with the Criminal background or proficiency in thieves' tools adds their proficiency bonus twice.

Rewards: Each completed job reduces the character's debt by 50 gp. Three jobs earn a Guild tally-stick and a favour that can be called in for a chart, a pilot, or a blind eye.

Time: One day per job, done in port.

Location: Gullclaw Cay and Harrowgate, where the Guild's caches and factors are.

Tamsin Quill is the factor who assigns the work and she will always add a condition. A failed job means the debt grows instead of shrinking, and the Guild sends very polite men. This activity drives Kip Marlow's personal quest.

Crew Drills

The character trains the Sea-Devil's Due's crew in boarding, fire-fighting, or damage control. Each drill is a Charisma (Intimidation or Persuasion) check against the crew's mood.

Requirements: A day aboard ship and the cooperation of Halda Storm or another officer. A character with the Sailor background or proficiency in vehicles (water) adds their proficiency bonus twice.

Rewards: A successful DC 14 check grants the ship 1d4 temporary hull points and gives the party advantage on one ship-based check during the next voyage. Three successful drills make the crew immune to the Chorus's attempts to bribe them.

Time: One day per drill, best done at sea.

Location: The deck of the Sea-Devil's Due during the voyage north, or the dry dock at Lordinium before departure.

Halda Storm watches every drill and judges the character by it. A failed drill costs morale and gives the Chorus an opening to recruit a disgruntled sailor. If the party has not told the crew about the blood price, a successful drill makes the eventual revelation hurt more.

Rumors

  • Carl of the Seven Seas buried four crews in nine years and the Crown still licenses his hulls. That tells you something about the Crown.
  • The grey-robed charity collectors are not collecting for burials. They are counting.
  • There is a heretic codex under the Gullclaw light that still has the words the Crown scraped out.
  • The fog wall takes one from every ship. It does not take the captain. It never takes the captain.
  • A woman came through Harrowgate a year ago asking the way to the Ninth Terrace and paying in coin nobody has minted in a hundred years.
  • Captain Orrin Grieve has a letter of marque from a kingdom that does not exist any more, and a priest chained in his hold.
  • The King's own hand signed the first expedition's orders. Ask the harbour captain what that means.
  • The burning sea is not burning water. It is something's blood, and it has been angry for a thousand years.
  • The shrine at Harrowgate lists the same seven family names over and over, going back four hundred years.
  • The island is a paradise. That is what frightens me.

Random Events

  • A grey-robed collector offers the party 200 gp to walk away from the expedition and never speak of Borealis again.
  • A dockhand recognises one of the party from a ship that sank and will not stop talking about it in the tavern.
  • A storm forces the Sea-Devil's Due to heave to for a day; the crew uses the time to ask the party what they are really being paid for.
  • A Chorus courier's satchel washes up on the shingle with a sealed letter addressed to Maelis Vane and a chart of the smoking strait.
  • A crew member's brother is on the lost list in Harrowgate shrine, and the crew member wants the party to look for the name.
  • The ship's cat will not go below decks and sits staring at the water for a whole watch.
  • A Tidewrights' Guild factor offers to buy the party's charts for a good price and does not ask where they came from.
  • A drowned sailor's body washes alongside the hull with a Chorus token sewn into its coat.
  • Orrin Grieve's Widow's Due is sighted two miles astern, making no effort to hide, and hails the ship to offer a trade.
  • On the island, a twisted creature follows the party for a mile and then lies down and does not get up.

Treasure Parcels

  • **Dry dock cradle:** a caulker's kit, 12 gp in old coin, and a chalk cross on the inner rib (Act I).
  • **Gullclaw sea cave:** the heretic codex, 80 gp in Chorus coin, and a sealed parcel addressed to a grey-robed buyer (Act I).
  • **Harrowgate warehouse cellar:** a crate of Guild charts, 120 gp, a ledger of offerings, and a freed courier (Act I).
  • **Penitent Star strongbox:** a Chorus reliquary worth 250 gp, a map of the nine terraces, and a potion of water breathing (Act II).
  • **Fogwall Gate:** 400 gp from the Chorus ship's strongbox, a sealed letter naming the Ninth Terrace, and the Warden's coral mask (Act II).
  • **Strand shrine:** a gold-and-obsidian censer worth 500 gp, 150 gp in Chorus coin, and the Chorus ledger naming Maelis (Act III).
  • **Sevenfold archive:** 300 gp in ancient coin, a ceremonial headdress worth 250 gp, and the sacrifice ledgers (Act III).
  • **Ninth Terrace:** the Chorus reliquary censer (500 gp), 250 gp in coin, and the shroud of the last offering (Act III).
  • **Heart of Borealis:** the crown of the vessel, 1,000 gp in Chorus treasure, and the inner circle's regalia worth 750 gp (Act III).

Spare Names

  • Sedge, the caulker with a grey cord under his apron
  • Ottilie, Odran's daughter, lost at the fog wall
  • Bram Kettle, a Harrowgate fisherman who will not sail north
  • Wren Ashby, a Tidewrights' Guild courier
  • Mother Ives, a sea-burial priest who is not what she seems
  • The Widow's Due, Orrin Grieve's privateer
  • Tallow Row, the sail loft street in the Lordinium dry docks
  • The Grey Gull, Greta Hearthstone's inn at Harrowgate
  • Corbin Slate, a Crown clerk who asks too many questions
  • The Salt Crown, the loudest tavern on Lordinium's harbour front
  • Hessa Vane, a cousin of Maelis who keeps a chandler's shop
  • The Tarred Keel, the dock crews' tavern in the dry docks

Starting Location

The Salt Road North

## The Salt Road North

Lordinium is the greatest port of the realm: red brick and steep tiled roofs, stepped gables over the harbour, a castle of the same brick on the hill, and a forest of masts below it. The Crown's clerks license every hull, the Tidewrights' Guild moves what the clerks do not see, and the Ash Chorus has been quietly buying charts in the taverns along the front.

North of the city the coast road runs through salt marsh and grey shingle to Gullclaw Cay, a low island with a lighthouse and more sea caves than the harbour guard has ever counted. Smugglers use it, the Guild owns it, and a dealer in forbidden texts keeps her stock beneath the light.

Beyond the cay the road becomes a sea road. Harrowgate is the last port before the ice: timber houses, a shrine of the Twelve too big for its congregation, and a harbour captain who has lost two boats to the fog this season. Everyone in Harrowgate has a relative who sailed north and did not come back.

This is the region of preparation and warning. The party hires on, survives sabotage, buys a heretic codex, and learns that the official scriptures have been scraped clean of a warning that the heretic copies still carry. By the time they leave Harrowgate, they should be certain of exactly one thing: someone does not want them to know what the return will cost.

Secrets

  • The official scriptures of the Twelve in Lordinium have had the blood-price warning scraped out, and Archivist Venn has proof of it.
  • Jory Tallow has been paid by the Ash Chorus to steer the Sea-Devil's Due into the fog wall's worst current.
  • The Ash Chorus has a cell in Harrowgate, hidden among the sea-burial priests at the shrine of the Twelve.

Key Locations

The City of Lordinium

## The City of Lordinium

Lordinium climbs a hill above its harbour in red brick and steep blue tiles. Stepped gables lean over the streets, pointed windows glow with lamplight, and the castle of the Crown sits at the top like a lid on the city. Below it the harbour front is a mile of quays, rope-walks, chandlers and taverns, and the Salt Crown is the loudest of them.

The city is prosperous and nervous. The King's brother has come home with a story about a burning sea, and the Crown's clerks have been told to be polite about it. Grey-robed charity priests collect for sea burials on every corner. The Tidewrights' Guild has rented three warehouses it does not need.

Everything the party needs before the voyage is here: a patron, a ship's company, a scholar who knows what was scraped out of the scriptures, and a quartermaster who will sell them a forbidden book. Everything that will go wrong on the voyage starts here too.

Additional Notes

Use Lordinium for shopping, downtime and the first faction contacts. The Crown's guards are polite but watch Carl's crew. The Ash Chorus does not attack here — it watches, and one of its members may offer the party money to walk away.

The Lordinium Dry Docks

## The Lordinium Dry Docks

Below the harbour front, behind a gate the Crown's guards open for anyone with a licence, the dry docks are a canyon of brick and timber. The Sea-Devil's Due sits in the largest cradle, a three-masted ship with a new copper sheath and a hull that has been quietly cut in four places.

Around her the dock is a small town of its own: rope-walks, a sail loft, a cooperage, the quartermaster's warehouse and a tavern called the Tarred Keel where the dock crews drink. Everyone here knows the ship has been sabotaged and nobody has told Carl.

At night the dock is lit by cressets and patrolled by two guards who would rather be elsewhere. It is the perfect place to cut a hull, and someone has been doing it for a week.

Additional Notes

Run the docks as a small investigation sandbox. The saboteur is Jory Tallow, the navigator, who is terrified and will confess if handled kindly. The Ash Chorus has an agent among the dock crews who paid him.

Gullclaw Cay

## Gullclaw Cay

A low grey island of shingle and salt grass, three miles around, with a lighthouse at one end and a hundred sea caves at the other. The light has burned for three hundred years and the Guild keeps it burning because ships that sink pay no fees.

There is no village, only the keeper's cottage, a stone storehouse, and a wooden jetty that the tide takes twice a day. The caves below the light are dry at low water and full of crates that the Crown has never seen. Tamsin Quill keeps her stock in the deepest of them, behind a door with three locks.

The cay is the last quiet place before the north. Gulls scream over the shingle, the light sweeps the water, and somewhere under the rock a heretic codex waits in a oilcloth wrapper for someone to pay for it.

Additional Notes

The cay is a short, tense stop. Tamsin sells the codex, the Chorus arrives to take it, and Odran the light-keeper begs the party to look for his daughter's name. Use the caves for a running fight.

Harrowgate

## Harrowgate

The last port before the ice. Harrowgate is a town of timber and tar, built on a headland above a harbour that freezes in a bad winter. Its houses are half-timbered and weather-beaten, its shrine of the Twelve is larger than its congregation, and one warehouse at the end of the quay burned last month and nobody will say who set it.

Everyone here has a relative who sailed north and did not come back. The parish register in the shrine lists them by the hundred. The harbour captain has lost two fishing boats to the fog this season and has a standing order to burn any grey-robed ship that enters her water.

The Grey Gull inn is warm and expensive. The shrine is cold and free. Between them they hold everything the party needs to know before the fog: the words that open the gate, the name of the first expedition's only survivor, and the location of the Chorus cell that has been buying charts.

Additional Notes

Harrowgate is the last chance to resupply and the first place the Chorus openly moves against the party. Captain Kane will grant a licence in exchange for dealing with the cell. Priest Aldous holds his predecessor's journal.

The Ashen Reach

## The Ashen Reach

North of Harrowgate the sea changes. The water turns the colour of iron and then of embers, and a black smoke rises off it that smells of burnt hair. The old charts end here. The Guild's charts end here. Only Carl's torn map goes on, and it goes on into the fog.

The strait is a maze of burning shoals and basalt reefs, and the safe channels shift with the tide. Ships that take the wrong one do not sink; they cook. The air is thick enough to taste, and at night the smoke glows from below.

Beyond the strait lies the fog wall: a vertical grey cliff of cloud that does not move in any wind, and a black basalt arch standing in the water before it. Something stands on the arch. It has been standing there a long time.

This is the region of passage and price. The party crosses a sea that is trying to kill them, finds the wreck of the first expedition, learns what the fog takes, and pays the gate's price to reach the island. By the time they see green land, they should understand that the warning in the codex was not a metaphor and that someone has been here before them.

Secrets

  • The burning sea is where the Thirteenth's blood fell when the Twelve bound it, and it has burned ever since.
  • The fog wall takes one life from every ship that passes, and it takes it from the crew, not the captain.
  • Maelis Vane passed the fog wall a year ago and left her sister Elspeth behind as the price.

Key Locations

The Smoking Strait

## The Smoking Strait

A hundred miles of iron-dark water, burning shoals and basalt reefs, choked with a black smoke that never clears. The shoals glow orange from below and hiss when the spray touches them. The reefs are black glass and cut a hull like a knife.

The safe channels shift with the tide and the smoke. Carl's chart shows one; Jory Tallow, if he confessed, knows another; Odran's chart shows a third. None of them agree, and all of them are partly right.

There is no land here, no anchorage, and no shelter from the smoke. The crew works in shifts with wet cloths over their faces. At night the glow from below turns the whole strait the colour of a forge, and the things that live in the burning water come up to look at the ship.

Additional Notes

Run the strait as a skill challenge with real consequences. Each failed check costs the ship hull points, crew, or time. The burning water is difficult terrain for anyone who falls in. The wreck of the Penitent Star is visible from the third day.

The Wreck of the Penitent Star

## The Wreck of the Penitent Star

A three-masted ship broken across a black basalt reef, her back snapped, her masts down, her hull open to the sky. She has been here a year. The sea has taken most of her, but the stern is above water and someone has rigged a sailcloth awning over it.

The reef around her is a graveyard of crates, bones and copper sheathing. The ship's boat is gone. The logbook is not. Neither is the woman who has been living on the stern, eating shellfish and gulls, waiting for a rescue that stopped coming a year ago.

The Penitent Star was the first expedition. Her crew is listed as lost in Harrowgate shrine. Most of them are still here, in the water, in the hold, and in the fog.

Additional Notes

The wreck is a rescue and a mystery. Elspeth Vane is alive on the stern. The logbook records the fog wall's price and the name of the person left behind. The hold is flooded and holds the crew's effects and a locked strongbox.

The Fogwall Gate

## The Fogwall Gate

A wall of grey fog stands from the sea to the sky and does not move in any wind. It has no edge and no top. Ships that sail into it come out the other side with one fewer crew member and no memory of the crossing.

Before it stands a black basalt arch, thirty feet high, rising out of water too deep to anchor in. On the arch stands a figure in a rotted naval coat and a mask of grey coral, perfectly still, who has been standing there since before the first expedition.

The water around the arch is flat and grey and full of things that do not surface. The fog does not reach the arch. Nothing does.

Additional Notes

The Warden tests every ship. The gate opens for a true name freely given, or for a life. The party can pay either. Cassian knows the words that open the gate and will trade them for a true name — his own, which he has forgotten.

Borealis

## Borealis

A green island in a grey sea, ringed by black cliffs and white beaches, covered in a forest that has not been cut in a thousand years. The air is warm and wet and smells of flowers and rot. Birds sing. Something large moves in the trees and does not come out.

The island is a paradise and it is wrong. The animals have too many eyes. The flowers open when you look at them. The ruins in the forest are beautiful and every carving on them has been chiselled away at the face.

Inland the forest gives way to the Sevenfold Ruins: a city of seven concentric plazas, built by the Seven Nations, empty for a thousand years. At its centre stands the Temple of the Twelve, and beneath the temple the terraces descend to the altar where the blood price was paid.

This is the region of revelation. The party learns what the Seven Nations did, what the Twelve allowed, and what the Thirteenth is. The clues planted in Act I pay off here, one after another, until the paradise is revealed as an abattoir with a garden on top.

Secrets

  • The Seven Nations did not live in harmony with the Twelve; they lived by feeding the Thirteenth, and the Twelve allowed it.
  • The blood price was one life every turning of the moon, drawn from seven hereditary families, and the last of those families is Nesa of the Ninth Terrace.
  • The Thirteenth is not dead and not bound forever; the altar is dry and the chains are loosening.

Key Locations

The Sevenfold Ruins

## The Sevenfold Ruins

A city of seven concentric plazas, each ring smaller and higher than the last, built of white stone and green with a thousand years of vines. The Seven Nations built it, and every carving on it has been chiselled blank at the face.

The plazas are empty. The houses are empty. The fountains are dry. In the outer ring the market stalls still stand with their awnings rotted to threads, and in the inner rings the temples stand open to the sky.

At the centre, on the highest terrace, stands the Temple of the Twelve. Its doors are open. Something inside is still keeping records.

Additional Notes

The ruins are a exploration and lore location. Ulric the scribe is in the archive in the fourth ring. The sacrifice ledgers are there, and so is the truth about the Seven Nations. The Ash Chorus patrols the outer ring.

The Strand of Bones

## The Strand of Bones

A white beach of ground coral and black sand, backed by cliffs and a wall of green forest. The water is warm and clear. The beach is covered in bones: fish, birds, sailors, and things that were never any of those.

At the north end of the strand stands a small shrine of the Twelve, half swallowed by the forest, its carvings chiselled blank. The creatures of the island come to it. They do not worship; they bring things and leave them, and the things they bring are always alive when they arrive.

The forest begins where the bones end. It is very quiet in there.

Additional Notes

The strand is the party's landing and first taste of the island. The shrine is the source of the twisting: it is a Chorus altar, not a shrine of the Twelve, and it has been feeding the forest for a year. Miri Salt is hiding in the rocks.

The Temple of the Twelve

## The Temple of the Twelve

A stepped temple of white stone at the centre of the ruins, with twelve shrines around its inner sanctum and a thirteenth niche that has been chiselled empty. The roof is gone. The floor is a mosaic of the Twelve Gods walking with mortals in a garden.

In the sanctum a woman sits on a throne of stone and gold leaf. She has been sitting there for a thousand years. She is not dead and she is not alive; she is preserved by the same binding that holds the Thirteenth, and she has been awake for every year of it.

The temple is the holiest place on the island and the quietest. Nothing has been here in a thousand years except the dust and the priestess and the thing beneath the floor.

Additional Notes

Senna tells the party the truth of the binding and the ritual to re-bind the Thirteenth. She does not soften it. The temple's undercroft leads down to the terraces. The Ash Chorus has not dared enter the sanctum.

The Ninth Terrace

## The Ninth Terrace

Nine terraces descend beneath the temple, each one a ring of stone cells around a central shaft. The upper terraces are empty and dry. The lower ones are not.

The ninth terrace is the altar: a black stone table in a circular pit, ringed by nine pillars, with chains set into the floor and a drain that goes down into the dark. It is dry. It has been dry for a year.

Above the altar, chained to a pillar, a young woman in a white shift is watching you come down. She has been there a long time and she is not surprised to see you. She is the last of the seven families, and the altar still knows her name.

Additional Notes

The terrace is the Chorus's stronghold on the island. Maelis Vane is not here; she is at the Heart. A Chorus priest and four cultists guard the altar. Nesa is chained above it. Breaking the altar frees her and opens the way to the Heart.

The Heart of Borealis

## The Heart of Borealis

A vast black crater at the centre of the island, ringed by the roots of a stone tree that is not a tree. The air is thick and warm and smells of iron. The fog that rings the island comes from here.

At the bottom of the crater the Thirteenth is bound: a shape of fog and ash and many hands, wrapped in chains of white stone, with a thousand years of offerings soaked into the ground around it. The chains are loose. One of them is broken.

Maelis Vane stands at the crater's edge with the Chorus's inner circle, and the shroud from the Ninth Terrace is spread on the ground before her. She is waiting for you. She has been waiting for a year.

Additional Notes

The finale. Maelis offers the party a place in the Chorus before she fights. The Thirteenth bargains. The party can fight, re-bind, bargain, or find another way. Nesa is the key to the re-binding.

Monsters & Enemies

Bilge Hull-Ghoul Bilge Hull-Ghoul Completed · CR 1/2 · Undead

Bloated pale undead dockworker crusted with copper filings and black tar, hollow eyes, bony fingertips, crouched in dark bilge water beneat…

Shriek Gull Shriek Gull Completed · CR 1/4 · Beast

A grey-and-white gull with a hooked beak and one clouded eye, perched on jagged coastal rocks.

Ash-Wrapped Penitent Ash-Wrapped Penitent Completed · CR 2 · Humanoid

A gaunt humanoid wrapped head to toe in grey, dripping bandages, ember-orange cracks glowing through the seams, standing on a foggy dock at…

Emberfin Drowned Emberfin Drowned Completed · CR 3 · Undead

Iron-grey drowned sailor with glowing orange seams, cinder hair, and black glass hooked fingers, lurking in burning water or a flooded ship…

Smoke-Shoal Serpent Smoke-Shoal Serpent Completed · CR 5 · Monstrosity

A huge eel-headed serpent with black basalt scales veined in glowing orange heat, coiling through scalding smoke and burning shoal water, f…

Brine-Swollen Deckhand Brine-Swollen Deckhand Completed · CR 2 · Undead

A bloated drowned sailor in rotted uniform, skin grey and waterlogged, seawater spilling from its mouth, standing knee-deep in a flooded, d…

Fog-Bleeding Shade Fog-Bleeding Shade Completed · CR 4 · Undead

A tall, thin silhouette of grey mist with a red seam across its throat, dripping a single drop of blood, drifting over a foggy strand of bo…

Coral-Antlered Strand Crab Coral-Antlered Strand Crab Completed · CR 2 · Beast

A pony-sized bone-white crab on a beach of skeletons, crowned with branching white coral antlers, one oversized claw raised, stalked eyes t…

Orchid-Maw Stalker Orchid-Maw Stalker Completed · CR 6 · Plant

A large predatory plant-cat of tangled green vines and orchid blooms, six thorned legs, and a flower head opening into a ring of teeth, cro…

Ink-Wisp of the Archive Ink-Wisp of the Archive Completed · CR 3 · Construct

A floating knot of glossy black ink and grey stone dust, trailing written script, half-formed into letters and grasping hands, drifting amo…

Chain-Choked Offering Chain-Choked Offering Completed · CR 6 · Undead

A gaunt, grey undead wrapped in rusted chains, eyes like black coins, standing on a stone altar in a dim temple terrace.

Ash-Handed Chorister Ash-Handed Chorister Completed · CR 8 · Humanoid

A gaunt human in grey robes, hands burned black, wearing a cracked mask of ash paste. It stands amid incense in a shadowed stone terrace.

Villain Plans

The Thirteenth, the God Beneath the Fog Character Sheet

BBEG, the imprisoned god of Borealis

Motivation

It was denied a seat among the Twelve and bound beneath the island by the blood of the Seven Nations. It does not want to destroy the world; it wants to be worshipped, and it has learned that worship is bought with blood. Every offering at the Ninth Terrace loosens a chain. It wants the chains gone.

Personality

It never raises its voice. It speaks in a chorus of the voices of everyone it has ever been fed, and it is unfailingly polite. It does not lie — it offers true things at terrible prices and lets the offer do the work. Portray it as the most reasonable being in the room.

Resources

  • The Ash Chorus and its cells in every northern port
  • Maelis Vane, its Crowned Vessel
  • The fog wall, which drinks blood and answers to it
  • The twisted beasts of Borealis, which were once its offerings
  • The blood-price altar at the Ninth Terrace
  • Whispers that reach the dreams of anyone who sleeps on the island

Battle Plan

It does not fight until it must. It bargains first, offering each character the one thing they want most in exchange for a single drop of blood freely given. If refused, it lets Maelis and the Chorus do the fighting. If the altar is fed, it rises as an avatar of fog, ash and many hands: it opens with a chorus that frightens and charms, then grapples and drags characters toward the crater's edge, using the terrain and its Chorus as a screen. It retreats into the fog when reduced below a third of its hit points and returns only if the altar is fed again.

Defeat or Redemption

It can be destroyed only by breaking the altar and scattering the bound blood, which ends it permanently. It can be re-bound by a volunteer of the old bloodline — Nesa of the Ninth Terrace is willing, and the party may find another way. It can also be bargained with: a new compact, freely entered, that ends the sacrifices but leaves it awake and worshipped. All three endings are legitimate; the module's final scene asks the party to choose.

Maelis Vane, the Crowned Vessel Character Sheet

Lieutenant, leader of the Ash Chorus and the Thirteenth's chosen

Motivation

She was the only survivor of the first expedition. The fog took her crew one by one and then took her, and the Thirteenth gave her back. She believes, with the certainty of the saved, that the god will end death itself — and that any price paid now is a rounding error against eternity.

Personality

Warm, tired, and completely unshakeable. She remembers every name of every person she has ever fed to the altar and recites them like a prayer. She will share her food, mend a character's wound, and then explain calmly why the party's crew must die.

Resources

  • The Ash Chorus, whose priests obey her without question
  • The key-words that open the fog wall
  • The logbook and charts of the Penitent Star
  • Ash-grey assassins in every northern port
  • A year's head start on the island and the altar prepared

Battle Plan

She opens with control magic — holding, blinding, silencing the party's healer — while her Chorus screens her. She never stands in the front rank. If reduced below half her hit points she uses the fog to escape and rejoins the fight at the Heart. If the party tries to talk, she listens, genuinely, and offers them a place in the Chorus.

Defeat or Redemption

She can be killed, and the Chorus fractures without her. She can be turned if the party proves the Thirteenth has been lying about ending death — her sister Elspeth Vane, alive on the wreck, is the strongest lever. Redeemed, she breaks the altar herself and dies doing it.

Captain Orrin Grieve, the Drowned Compass Character Sheet

Lieutenant, rival treasure hunter and privateer

Motivation

He wants the god's power for himself. He lost his first crew to the fog and came back with nothing but a reputation, and he has decided that a man who cannot be a king of the sea will settle for being a god of an island. He blames Carl for the loss and intends to take the expedition's glory and its ship.

Personality

Loud, funny, generous with other people's money, and vicious the moment he is cornered. He calls everyone 'friend' and means it right up until he does not. He keeps a stolen Chorus priest chained in his hold and asks it for advice.

Resources

  • The Widow's Due, a fast three-masted privateer
  • A crew of forty cutthroats and one chained Ash Chorus priest
  • A stolen copy of Carl's chart
  • A letter of marque from a kingdom that no longer exists
  • Knowledge of the smoking strait's safe channels

Battle Plan

He shadows the expedition, lets it clear the fog, and strikes when the party is ashore and tired. He boards the Sea-Devil's Due, takes hostages, and offers to trade them for the chart and the codex. If forced into a fight he uses his crew as a screen, cuts the rigging to drop it on characters, and flees into the fog the moment the odds turn.

Defeat or Redemption

He can be killed, and his crew scatters. He can be bought — he will take a share of the island's treasure and sail away, though he will betray the party if the Thirteenth offers him more. He can be humiliated and left alive, which makes him a recurring nuisance in the epilogue.

NPCs in The Salt Road North

Archivist Venn

A small, dry woman with ink-stained cuffs and spectacles she never removes. She has spent forty years cataloguing the official scriptures of the Twelve and knows every place where a line has been scraped out. She is not supposed to know that.

Role: Keeper of the Crown's scripture

Other Details: Venn has quietly compared the official copies against three heretic codices and knows the blood-price warning was deliberately erased. She will not say so aloud in Lordinium, but she will tell a party that asks the right question and brings her a heretic text to compare.

Obb the Quartermaster

A round, cheerful man with a abacus callus on one thumb and a warehouse full of goods of uncertain provenance. He sells the party rope, oil, warm coats and one very illegal heretic codex, and he will deny all of it to the harbour guard.

Role: Ship's quartermaster and merchant

Other Details: Obb owes the Tidewrights' Guild a great deal of money and is being squeezed. He will trade information for coin or for a favour done against the Guild. He knows a Chorus courier has been buying charts in Harrowgate and has been too frightened to mention it.

Jory Tallow

Barely twenty, with a navigator's astrolabe he treats like a holy relic and a habit of talking to the sea. He is the best natural navigator Carl has ever hired and the worst liar. He has been paid to lose the ship.

Role: Navigator of the Sea-Devil's Due

Other Details: Jory took Chorus money in Lordinium to steer the Sea-Devil's Due into the fog wall's worst current. He is sick with guilt and will confess if pressed kindly. If he confesses, he can lead the party through the smoking strait by a safe channel he was given.

Tamsin Quill

Sharp-faced and quick-handed, dressed in a man's coat and three scarves. She keeps her stock in a sea cave under the lighthouse and her prices in her head. She is the only person on the northern coast who will sell a heretic codex to strangers.

Role: Dealer in forbidden texts

Other Details: Tamsin is a Tidewrights' Guild factor and reports every sale to Harrowgate. She has already sold one codex to a grey-robed woman who paid in old coin and asked about the Ninth Terrace. She is frightened of that woman and will say so if the party buys her a drink.

Odran the Light-Keeper

A stooped, salt-bleached man who has kept the Gullclaw light for thirty years and speaks to it as a person. He lost his daughter to the sea and has never quite accepted it. He keeps a small shrine to the Twelve in the lamp room.

Role: Lighthouse keeper of Gullclaw Cay

Other Details: Odran's daughter Ottilie sailed on the Penitent Star and is listed as lost. He does not know she reached the fog wall. He will give the party his only boat and his last cask of oil if they promise to look for her name in the wreck's log.

Priest Aldous

A heavy, slow-moving old priest with a voice built for a cathedral and a shrine too small for it. He has buried more sailors than he has married. He keeps the parish register, and in it the names of everyone who ever sailed north and did not come back.

Role: Priest of the Twelve at Harrowgate

Other Details: Aldous's predecessor sailed with the first expedition and came home alone, and died raving about a price. Aldous has the man's journal, which describes the fog wall and the words that open it. He will give it to the party if they agree to bring the northern dead home.

Greta Hearthstone

A wide, warm woman with flour on her sleeves and a ledger of every debt in Harrowgate. Her inn is the last hot meal before the ice and she charges accordingly. She hears everything and repeats about a third of it.

Role: Innkeeper of the Grey Gull

Other Details: Greta's brother is a Tidewrights' Guild courier who has gone missing between Harrowgate and Gullclaw Cay. She will pay the party in information and free lodging to find out what happened to him, and she knows which of her guests wear grey under their coats.

Captain Verity Kane

Open Character Sheet

Cropped grey hair, a naval coat cut for weather, and a hand that rests on her sword hilt when she is thinking. She runs the last port before the ice and does not like strangers, cults, or Carl of the Seven Seas, in that order.

Role: Harbour captain of Harrowgate

Other Details: Kane has lost two fishing boats to the fog this season and has a standing order to burn any grey-robed ship that enters her harbour. She will grant the expedition a licence if the party deals with the Chorus cell in her town, and she will sail with them herself if the Crown orders it.

Carl of the Seven Seas

Open Character Sheet

Broad, sun-cooked and loud, with a beard like rope and a coat that has been repaired in eleven ports. He wears his fame easily and his family name badly. He is generous, reckless, and hiding one thing: he has read the warning about the blood price and decided it was a copying error.

Role: Expedition patron, the King's younger brother

Other Details: He genuinely believes Borealis is the homeland of the Seven Nations and that finding it will make his name immortal. He is wrong about the harmony and beginning to suspect it. He will fight beside the party and will not abandon a crew member, which is exactly the lever Maelis Vane intends to use on him.

Halda Storm

Open Character Sheet

Tall, grey-eyed and permanently unimpressed, with a boatswain's voice that carries over a gale. She has sailed with Carl for six years and has buried four of his crews. She keeps the ship's books, the ship's discipline, and a knife in her boot.

Role: First mate of the Sea-Devil's Due

Other Details: Halda does not trust the expedition and says so. She has noticed the sabotage and has not told Carl because she suspects someone in the crew. She will back the party against Carl if the party is right, and she will not forgive them if they are wrong.

NPCs in The Ashen Reach

Elspeth Vane

Gaunt, sunburnt and very calm, wrapped in sailcloth on the wreck's stern. She has been alone on the reef for a year, eating what the sea gives, and she has stopped expecting rescue. She looks remarkably like her sister.

Role: Sole survivor of the Penitent Star

Other Details: Elspeth is Maelis Vane's younger sister and was left behind at the fog wall as the price the first time. She does not know her sister lives, and learning it is the strongest lever the party can use against Maelis. She kept the Penitent Star's logbook dry inside her coat.

Cassian, the Fog Warden

Open Character Sheet

A tall figure in rotted naval coat and a mask of grey coral, standing on a basalt arch where no ship can anchor. He was the first expedition's boatswain and the fog kept him. He speaks in short, careful sentences, as if words cost him something.

Role: Warden of the fog gate

Other Details: Cassian has stood at the gate for a hundred years by his own reckoning and thirty by the world's. He tests every ship that comes: the fog opens for those who pay its price and closes on those who lie about it. He knows the words that open the gate and will trade them for a true name.

NPCs in Borealis

Miri Salt

A wiry young sailor with a broken arm splinted with driftwood and a spear she made from a boat hook. She has been on the strand for three months and has learned exactly how the twisted creatures hunt. She talks fast, as if she has been saving it up.

Role: Stranded sailor and castaway

Other Details: Miri was the cabin hand on Orrin Grieve's Widow's Due and was left ashore when the captain found the island too dangerous. She knows Grieve's plans and his safe channels. She will guide the party inland if they take her with them, and she is terrified of the shrine on the strand.

Ulric, the Last Scribe

A translucent old man in the robes of a temple scribe, bent over a stone lectern that has not held a book in a thousand years. He is not a ghost and not alive; he is a record that refuses to stop being kept. He is delighted to have someone to talk to.

Role: Undying scribe of the Seven Nations

Other Details: Ulric wrote the sacrifice ledgers and has been trying to erase them ever since. He will tell the party the truth about the blood price if they ask him plainly, and he will lie about it if they ask him as a priest of the Twelve. He wants the ledgers destroyed and cannot do it himself.

Senna, the Last High Priestess

A woman of stone and gold leaf, seated on a throne in the inner sanctum, preserved by the same binding that holds the Thirteenth. She has been awake for every year of it. Her voice is a dry rustle and her eyes are entirely black.

Role: Last high priestess of the Twelve on Borealis

Other Details: Senna negotiated the binding and has regretted it for a thousand years. She will confess the bargain to the party without being asked twice. She knows the ritual to re-bind the Thirteenth and the price it demands, and she will not pretend the price is small.

Nesa of the Ninth Terrace

A young woman in a white shift, chained to a pillar above the altar, who has been kept alive and unaged by the god she is meant to feed. She is thin, furious, and entirely without self-pity. She has been listening to the Thirteenth for a very long time.

Role: Last daughter of the old bloodline

Other Details: Nesa is the last of the Seven Nations' sacrificial lines and the only offering the altar still recognises. She knows the Thirteenth's voice better than anyone alive and can tell the party when it is lying. She is willing to die to re-bind it, and she would very much prefer not to.

Factions

The Crown of Lordinium

## The Crown of Lordinium

The royal administration of King Soleiman, run from the red-brick castle above Lordinium's harbour. Its clerks license every hull that leaves the city, its harbour guard walks the moles, and its knights ride the coast road. The Crown is rich, cautious and deeply embarrassed by the King's younger brother, whose expeditions keep costing it ships.

Its officers are professionals, not villains: they want the north charted, the sea lanes safe and Carl brought home alive. They do not know what is on Borealis, and they would very much like to keep it that way.

Goals

- Keep the northern sea lanes open and charted.
- Bring Carl of the Seven Seas home alive and quiet.
- Prevent any foreign power from claiming Borealis.
- Suppress heretic scriptures that stir up the old blood-price rumours.

Relationships

With Other Factions
Tolerates the Tidewrights' Guild because it needs smugglers' charts, and quietly employs them. Has no knowledge of the Ash Chorus and would treat it as a proscribed cult if it did. Treats Captain Orrin Grieve as a pirate with a letter of marque that should have been revoked years ago.
With Players
Wary at first: the party is Carl's crew, and Carl is a liability. Once the party brings back proof of the Ash Chorus, the Crown becomes a patron — harbour access, a naval escort, and a bounty on Maelis Vane.

The Ash Chorus

## The Ash Chorus

A cult of the Thirteenth, dressed as a charitable order of sea-burial priests. Its members wear grey and speak in unison when they pray. They believe the Twelve cheated the world of a god, and that the Thirteenth's freedom will end death itself.

The Chorus has cells in every northern port and a year's head start on Carl. It does not want treasure. It wants the expedition's crew, delivered alive to the altar at the Ninth Terrace, because the blood price must be paid in full and the old bloodlines are gone.

Goals

- Complete the blood price at the Ninth Terrace.
- Deliver the Thirteenth from its binding beneath Borealis.
- Recruit or replace the last of the old bloodlines.
- Silence anyone who reads the heretic codices.

Relationships

With Other Factions
Hunts the Crown's officers when it can do so quietly. Buys charts from the Tidewrights' Guild and murders its couriers afterwards. Despises Orrin Grieve, who wants the god's power for a mortal and understands nothing.
With Players
Hostile. Chorus cells attack the party on sight once the party has read a heretic codex or interfered at Gullclaw Cay. Before that they watch, and one of them may offer the party a great deal of money to turn the ship around.

The Tidewrights' Guild

## The Tidewrights' Guild

Half merchant house, half smugglers' compact, the Guild moves goods the Crown taxes too heavily and charts the Crown does not have. Its halls are in Harrowgate and its caches are in every sea cave from Lordinium to the ice.

Guildsfolk are practical. They will sell a heretic codex to a scholar and the scholar's address to a cult in the same afternoon, and they will not lose sleep. They keep the northern lighthouses burning because ships that sink pay no fees.

Goals

- Keep the northern trade routes profitable.
- Own the only accurate charts of the smoking sea.
- Stay neutral in any war between the Crown and the Chorus.
- Collect on every debt, including the ones written in blood.

Relationships

With Other Factions
Profitable and uneasy with the Crown of Lordinium. Sells to the Ash Chorus and fears it. Loathes Orrin Grieve, who robs Guild warehouses and calls it privateering.
With Players
Neutral. The Guild will trade with the party, sell charts and information, and offer side work — as long as the party pays and does not ask where the goods came from.

Main Questline

The Blood Price of Borealis

Carl hires the party to sail north, cross the burning sea, pass the fog wall and chart Borealis. Along the way they must keep the Sea-Devil's Due afloat, keep the crew alive, and find out what the scraped-out warning in the scriptures actually means. The quest ends at the Heart of Borealis, where the party decides whether the Thirteenth is destroyed, re-bound, or bargained with.

Goals

- Sign on with Carl at the Salt Crown in Lordinium.
- Get the Sea-Devil's Due through the smoking strait and the fog wall.
- Reach the Heart of Borealis and stop the blood price being paid in full.
- Decide the fate of the Thirteenth.

Reward

**Reward:** a full share of the expedition's salvage (2,000 gp each on return), a captain's commendation from the Crown of Lordinium, and the pick of the Chorus reliquaries recovered from the island.

Secrets

  • Carl has already read the blood-price warning and decided privately that it was a copying error.
  • The King signed the first expedition's orders and knew the price was part of the bargain.
  • The Thirteenth cannot end death, only feed on it, and it has lied to Maelis Vane about this for a year.

DM Notes

This is the spine of the campaign. Keep Carl present and likeable so his private decision hurts when it surfaces. Every act should end with the party knowing one more true thing about the price. Do not let the finale become only a fight: the three endings (destroy, re-bind, bargain) are all legitimate and the module's last scene asks the party to choose.

The Erased Warning

Given by: Archivist Venn
Venn has compared the official scriptures of the Twelve against three heretic codices and knows a warning was deliberately scraped out of every sanctioned copy. She cannot say so in Lordinium without losing her post. She asks the party to bring her a heretic text from the north — from Obb's warehouse or Tamsin Quill's cave — and to record where it came from, so the erasure can be proved rather than merely suspected.

Goals

- Obtain a heretic codex from Obb the Quartermaster or Tamsin Quill.
- Bring it to Archivist Venn in Lordinium without the Crown's clerks noticing.
- Read the two texts side by side and decide what to do with the proof.

Reward

**Reward:** Venn's written comparison (a political weapon worth 500 gp to the right patron), a *codex of the erased verse* if the party has not already found one, and free access to the castle library for the rest of the campaign.

Secrets

  • Venn has known about the erasure for eleven years and has said nothing.
  • The erasure was ordered by the Crown's own clerks, on the Twelve's instruction, four hundred years ago.
  • The heretic codices were copied by priests who were executed for it, and their names are still in the margin.

DM Notes

This quest is the party's early engine for the mystery. If they skip it, they arrive on Borealis blind and the Ash Chorus ambushes them at the strand. Venn is dry and careful, not dramatic; her confession should land quietly. The proof is worth more as leverage than as coin.

The Fog's Toll

Cassian has stood on the basalt arch before the fog wall for thirty years and cannot remember his own name. He tests every ship that comes: the fog takes one life from each crew unless someone gives it a true name freely. He will trade the words that open the gate for his own name back, and he will tell the party plainly what the fog has taken from the ships before them — including the woman the fog called Crowned Vessel.

Goals

- Reach the Fogwall Gate without losing the ship in the smoking strait.
- Learn the fog's price from Cassian or from the Penitent Star's logbook.
- Open the gate by paying the price, giving a true name, or breaking the fog's hold on Cassian.

Reward

**Reward:** the words that open the fog gate without a death, Cassian's service as a guide on the island, and a *Warden's coral mask* if he is freed.

Secrets

  • Cassian was the first expedition's boatswain and the fog kept him as its warden.
  • The fog takes the life it chooses, not the one the captain offers, unless a true name is freely given.
  • The fog remembers Maelis Vane and calls her Crowned Vessel, which means she has been through twice.

DM Notes

Run this as a negotiation and a puzzle, not a brawl. Cassian is not a villain and should never be statted as one; he is a tired man doing a job he hates. If the party fights him, the fog takes a life anyway and they gain nothing. The best outcome costs them something they would rather keep.

The Last Offering

Given by: Nesa of the Ninth Terrace
Nesa has been chained above the altar for a year and has listened to the Thirteenth every night. She knows how it lies and wants the party to use that. She asks them to take a written confession from each of the three Chorus priests on the island — at the strand, the ruins and the terrace — so that when the god is faced it cannot pretend the price was freely paid. Then she asks them to break the altar and free her.

Goals

- Take a written confession from the Chorus priests at the strand, the ruins and the terrace.
- Break the blood-price altar at the Ninth Terrace and free Nesa.
- Read the confessions at the Heart before facing the Thirteenth.

Reward

**Reward:** Nesa's knowledge of the Thirteenth's bargains (advantage on saving throws against its offers), the Chorus's gold-and-obsidian censer worth 500 gp, and Nesa's willingness to volunteer for the re-binding.

Secrets

  • The three priests have each been promised a place at the god's right hand and none believe the others deserve it.
  • The confessions, read aloud at the Heart, weaken the Thirteenth's hold on Maelis Vane.
  • Nesa has already decided to volunteer and is looking for a reason not to.

DM Notes

This quest gives the party a non-combat route through the Chorus and a mechanical edge in the finale. Each priest is a roleplay encounter first and a fight second. If the party kills a priest without a confession, the Thirteenth gains a bargaining chip and the finale gets harder.

Side Quests in The Salt Road North

The Salt Crown's Debt

Given by: Obb the Quartermaster
Obb the Quartermaster is three hundred gold in debt to the Tidewrights' Guild and the Guild has started sending very polite men to his warehouse. He cannot pay, and he cannot sail if the Guild seizes his stock. He offers the party a deal: recover a crate of Guild goods that went missing between Lordinium and Gullclaw Cay, and he will call the debt settled and give them the heretic codex for free. The crate is in a sea cave on the cay, guarded by the two Guild men who stole it and are now trying to sell it to the Ash Chorus instead.

Goals

- Find the missing crate on Gullclaw Cay.
- Deal with the two Guild thieves without starting a war with the Tidewrights.
- Decide what to do with the Chorus ledger inside it.

Reward

**Reward:** the heretic codex at no cost, 150 gp from Obb's strongbox, and a permanent 10% discount on the quartermaster's goods for the rest of the campaign.

Secrets

  • The two Guild men who stole the crate are planning to sell it to the Chorus and blame Obb.
  • The crate does not hold goods; it holds a Chorus ledger listing every offering made at the Ninth Terrace for the last hundred years.
  • Obb knew what was in the crate and is more frightened of the ledger than of the Guild.

DM Notes

Run this as a short investigation and a two-enemy fight in a sea cave. The ledger is the real prize: it names Maelis Vane as the Chorus's Crowned Vessel a full act before the party meets her. If the party returns the ledger to Obb, he burns it in a panic and the clue is lost.

The Light-Keeper's Child

Given by: Odran the Light-Keeper
Odran the light-keeper has kept the Gullclaw light for thirty years and has never accepted that his daughter Ottilie drowned. She sailed as a cabin hand on the Penitent Star, the first expedition's ship, and her name is on the lost list in Harrowgate shrine. Odran asks the party to look for her name in the wreck's log and bring back anything of hers. He has no money, but he has his only boat, a cask of lighthouse oil, and a chart of the northern currents that the Guild does not have.

Goals

- Reach the wreck of the Penitent Star.
- Find Ottilie's name and effects in the log and the crew chests.
- Bring Odran word of what happened to her.

Reward

**Reward:** Odran's boat (a seaworthy six-oar launch), a cask of lighthouse oil, and a hand-drawn chart of the northern currents that grants advantage on navigation checks in the smoking strait.

Secrets

  • Ottilie did not drown; she reached the fog wall and was left behind as the first expedition's price.
  • Her name is in the Penitent Star's log beside the words left at the gate.
  • Odran's chart marks a safe channel through the smoking strait that the Chorus does not know.

DM Notes

This quest pays off in Act II at the wreck. Ottilie's fate is the party's first concrete proof that the fog takes people, not ships. If the party tells Odran the truth, he asks them to bring her name home and gives them the chart early. If they lie, he knows.

Side Quests in The Ashen Reach

Ottilie's Last Rite

Given by: Elspeth Vane
Elspeth Vane spent a year alone on the Penitent Star and buried no one. The crew are still in the water and the hold, and she cannot leave them like that. She asks the party to help her give them a sea burial before the ship sails on: recover the seven bodies from the flooded hold and the reef, say the words of the Twelve over them, and put them in the water with weights. She has no money, but she has the first expedition's strongbox and she will open it for the party if they help her.

Goals

- Recover the seven bodies from the wreck and the reef.
- Say the rites of the Twelve over them and commit them to the sea.
- Open the strongbox and decide what to do with the Chorus reliquary.

Reward

**Reward:** the first expedition's strongbox (a Chorus reliquary worth 250 gp, a map of the island's nine terraces, and a potion of water breathing), plus Elspeth's trust and her full account of the fog wall.

Secrets

  • One of the seven bodies is not a crew member; it is a Chorus priest who was on the first expedition in disguise.
  • The Chorus reliquary in the strongbox is the key to the Ninth Terrace's inner door.
  • Elspeth knows her sister is alive and has not said so, because she does not know how she feels about it.

DM Notes

This is a quiet, character-driven quest between the strait and the gate. The bodies in the hold are animated and fight if disturbed carelessly; the rite must be done properly. The disguised Chorus priest is the clue that the cult was on the first expedition from the start.

The Drowned Compass

Given by: Halda Storm
Halda Storm has sailed with Carl for six years and buried four crews, and she has had enough. She wants proof that Carl's expedition is worth the lives it is spending, and she wants it before the fog. She asks the party to search the Penitent Star for the first expedition's orders and bring back anything that shows what Carl's brother the King knew about Borealis and when he knew it. If the Crown sent the first expedition knowingly, Halda will take the ship home and damn the consequences.

Goals

- Search the Penitent Star's captain's cabin for the expedition's sealed orders.
- Bring them to Halda Storm unopened.
- Decide whether to show them to Carl.

Reward

**Reward:** Halda's loyalty and a ship's company that will not mutiny at the worst moment, plus 200 gp from the ship's contingency fund and a set of masterwork navigator's tools.

Secrets

  • The first expedition's orders were signed by the King's own hand and mention the blood price as an acceptable cost.
  • Carl does not know his brother signed them.
  • Halda will mutiny if the party brings her the orders and Carl tries to sail on anyway.

DM Notes

This quest puts the party between Carl and his first mate at the worst possible time. The orders are in a lead tube in the captain's cabin, which is underwater. If the party hides the orders, Halda finds out and never trusts them again. If they show Carl, he is genuinely shaken and the expedition's tone darkens.

Side Quests in Borealis

The Last Offering

Given by: Nesa of the Ninth Terrace
Nesa has been chained above the altar for a year and has listened to the Thirteenth every night. She knows it lies, and she knows how it lies, and she wants the party to use that. She asks them to find the three Chorus priests who have been feeding the altar and take from each a written confession of what they have done, so that when the Thirteenth is faced, it cannot pretend the price was freely paid. The priests are at the strand, the ruins and the terrace, and each one will bargain for their life.

Goals

- Find the three Chorus priests at the strand, the ruins and the terrace.
- Take a written confession from each, by persuasion or force.
- Read the confessions at the Heart before facing the Thirteenth.

Reward

**Reward:** Nesa's full knowledge of the Thirteenth's bargains, which grants advantage on saving throws against its offers, plus the Chorus's reliquary (a gold-and-obsidian censer worth 500 gp) and Nesa's willingness to volunteer for the re-binding.

Secrets

  • The three priests have each been promised a place at the god's right hand and none of them believe the others deserve it.
  • The confessions, read aloud at the Heart, weaken the Thirteenth's hold on Maelis.
  • Nesa has already decided to volunteer and is looking for a reason not to.

DM Notes

This quest gives the party a non-combat route through the Chorus and a mechanical edge in the finale. Each priest is a roleplay encounter first and a fight second. If the party kills a priest without a confession, the Thirteenth gains a bargaining chip and the finale is harder.

The Scribe's Ledger

Given by: Ulric, the Last Scribe
Ulric has been trying to erase the sacrifice ledgers for a thousand years and cannot, because he is a record and records do not destroy themselves. He asks the party to carry the ledgers out of the ruins and burn them in the crater at the Heart, where the Thirteenth can see. He believes that if the god watches its own accounts burn, it will understand that the price is ended. He cannot promise it will work. He can promise that the ledgers are the only proof of what the Twelve allowed.

Goals

- Carry the ledgers out of the Sevenfold Ruins.
- Keep them from the Chorus, who want them destroyed quietly.
- Burn them in the crater at the Heart, in the Thirteenth's sight.

Reward

**Reward:** Ulric's blessing (a one-time +1d6 to a Religion or Arcana check at the Heart), the ledgers themselves as evidence against the Twelve, and 300 gp in ancient coin from the archive's strongbox.

Secrets

  • Burning the ledgers at the Heart weakens the Thirteenth's hold on the island's creatures.
  • The ledgers also record the Twelve's signatures on the original binding, which the temple has always denied.
  • Ulric will fade once the ledgers are destroyed, and he is looking forward to it.

DM Notes

This quest turns the ledgers from a clue into a weapon. The Chorus will try to steal them at every stage. If the party burns them at the Heart, the Thirteenth's avatar-form loses its regeneration and the creatures of the island stop fighting. If they keep them as evidence, the epilogue changes: the Crown is discredited and the party has a political weapon.

Character Quests for Kip Marlow

The Tally Stick

Kip's indenture is carved on a Guild tally-stick that Tamsin Quill keeps in the deepest cave under the Gullclaw light, and the only way to end the debt is to put that stick in her hand and pay what it says. Tamsin will not simply sell it back; she wants a favour first, and the favour is carrying a sealed oilcloth parcel to a grey-robed buyer in Harrowgate without opening it. Kip has to decide whether to run the parcel blind, open it and risk the Guild's anger, or find another way to clear the tally before the Chorus arrives at the cave and the whole bargain goes up in smoke.

Starting point

Reach Gullclaw Cay and negotiate with Tamsin Quill over the tally-stick and the parcel.

Choice

Run the parcel blind, open it, or refuse the favour entirely.

Running it blind deepens Kip's debt to the Guild's grey partners; opening it risks the Guild's anger and reveals Chorus coin inside; refusing means Tamsin raises the tally.
Mechanical Rewards
  • Release from the Guild indenture
  • Tamsin Quill as a permanent ally and fence
  • The tally-stick's burned halves as a luck charm (+1 to one Deception check per session)
Narrative Rewards
  • Kip is a free man for the first time in his adult life
  • Tamsin owes him a drink — and a favour

The Low-Tide Map

Kip has spent years learning the low-tide entrances of every sea cave from Lordinium to the ice, knowledge the Guild never paid him to record. Now Odran the light-keeper needs a route through the caves of Gullclaw Cay that the Chorus does not know, and Kip is the only one who has it. Mapping the entrances means diving at slack water, dodging the Lantern-Jawed Lurker, and deciding whether to sell the map to the Guild — who will own him with it — or give it to the party and Odran for nothing.

Starting point

Survey the low-tide entrances of Gullclaw Cay's caves.

Choice

Work alone at night or take the party into the caves.

Alone, Kip proves he can stand on his own; together, he learns to trust.
Mechanical Rewards
  • A hand-inked chart of the low-tide entrances granting advantage on navigation and Stealth checks on the northern coast
  • Possible 300 gp or debt reduction
Narrative Rewards
  • Odran's friendship and free access to the light
  • A reputation as more than a runner

Wren in the Grey

Wren Ashby, Kip's Criminal Contact and the only friend the Guild never managed to make him regret, has gone missing between Harrowgate and Gullclaw Cay — the same stretch of coast where the Chorus has been murdering Guild couriers after buying their charts. Greta Hearthstone, Wren's sister in everything but blood, will pay in information and free lodging for the truth. Finding Wren means reading the Chorus's grey wax seals, walking into the burned warehouse cellar, and facing the possibility that the friend who once pulled Kip out of the surf is already counting in the dark with the others in unison.

Starting point

Trace Wren's last route from the Grey Gull to the cay.

Choice

Question the Chorus watchers openly or shadow them in Thieves' Cant.

Open questions put the Chorus on notice; shadowing keeps Kip invisible but slow.
Mechanical Rewards
  • Wren Ashby as a freed contact with Chorus courier knowledge
  • Greta Hearthstone's free lodging and information network
  • A partial chart of the smoking strait or a Chorus courier's satchel
Narrative Rewards
  • Kip repays the one person who never put his name on a debt

Character Quests for Orla Fenn, the Margin-Witch

The Scraped Margin

Orla's ledger lists eleven places in the official scriptures where a line was cut away. Archivist Venn will only open the castle's locked comparison room for someone who brings a heretic codex and a written statement of its provenance. Orla must get the codex out of Obb's warehouse or Tamsin Quill's cave, smuggle it back to Lordinium past the Crown's clerks, and sit with Venn while the two texts are read side by side.

Starting point

Acquire a heretic codex from Obb or Tamsin Quill and document where it came from.

Choice

Buy the codex outright, trade a favor, or steal it from the Chorus cell that comes to burn the cave.

Each route leaves a different trail: a receipt the Guild can trace, a debt Tamsin can call in, or a burned cave that puts the Chorus on Orla's scent.
Mechanical Rewards
  • Venn's written comparison, a political weapon worth 500 gp to the right patron
  • Free access to the castle library for the rest of the campaign
  • One of: Margin-Witch's Testimony (advantage feature), a restricted-archive favor, or +1 Wisdom
Narrative Rewards
  • Proof that the blood-price warning was deliberately erased
  • Venn's confession and her full knowledge of the eleven scraped lines
  • Orla's transformation from copyist to witness — the first person in four hundred years to say the erased sentence aloud

The Copyist's Ghost

One of the eleven scraped lines in Orla's ledger was not scraped by the Crown's clerks — the ink beneath it is two hundred years older than the others, and the hand that wrote it matches no scripture in the castle library. Tracing that hand leads Orla to a dead copyist, a hidden workshop in the Lordinium docks, and the first heretic who tried to keep the warning alive. Her workshop still holds a half-finished codex and a letter naming who gave the order.

Starting point

Match the anonymous hand against records, guild marks, and grave registries to identify the original copyist.

Choice

Work openly through the library, or quietly through Obb and the docks.

The open route brings Corbin Slate, a Crown clerk who asks too many questions, down on her; the quiet route puts Orla in the Guild's debt.
Mechanical Rewards
  • Either the 'Heretic's Hand' feature or double-value court evidence
  • The dead copyist's pen and ink kit: advantage on one Forgery or Calligraphy check per day
  • A new spell for her book: Comprehend Languages becomes permanently prepared
Narrative Rewards
  • The name of the person who ordered the erasure
  • A lineage: Orla learns she is not the first margin-witch, only the latest
  • A letter that can be delivered to someone who cannot bury it — or burned

The Twelfth Inkwell

Orla's ledger has a twelfth entry she has never shown anyone: a discrepancy she found in her own handwriting, in a copy she made herself, five years before she began keeping the ledger. Either someone used her hands while she slept, or she scraped the line herself and does not remember. The line that is missing from her own work is the same line that is missing from every scripture: the blood-price warning. She must find out what happened on that night, and it takes her through her own Trance memories, the library's night records, and finally to Archivist Venn, who was in the building.

Starting point

Reconstruct the night of the discrepancy from the library's duty rosters, her own ink purchases, and the state of her copy.

Choice

Use divination and Trance-memory to relive the night, or reconstruct it purely from evidence and never know for certain.

Reliving it means learning what she did; evidence alone preserves a merciful ambiguity that will haunt her.
Mechanical Rewards
  • Either 'Unblinking Witness' or +2 Intelligence saves vs. illusion and enchantment
  • Either 'Venn's Pale Lamp' or +1 spell save DC
  • The twelfth entry completed: her ledger becomes a complete record, and reading it aloud once per day grants her advantage on her next Investigation check
Narrative Rewards
  • The truth of the night she cannot remember
  • Venn's full confession, and the real reason Orla was never reported
  • Proof that the erasure is not only historical — it is ongoing, and it reaches into copyists' hands

Character Quests for Sella Rooke, the Keelbreaker

The Fourth Cut

While counting the sabotage cuts in the Sea-Devil's Due's dry dock cradle, Sella finds a fifth mark nobody else has seen: a chalk cross on the inner rib, identical to the mark found on the ship that sank under her nine years ago. She must convince Halda Storm to walk the cradle with her, match the chalk to a caulker's kit, and hear her out before the tide floats the ship. Success means Halda clears her name before the whole crew and awards her the mate's berth; failure means Halda assumes she is covering for the saboteur and puts her ashore at Gullclaw Cay.

Starting point

Find the fifth chalk mark and identify the caulker's knife that made it.

Choice

Bring the mark to Halda immediately or investigate Sedge the caulker first.

Going to Halda first risks dismissal; investigating Sedge risks being caught alone in the cradle at night.
Alternative

Confront Sedge alone or with witnesses.

Sedge will try to drown her in the bilge if she comes alone.
Mechanical Rewards
  • Mate's berth on the Sea-Devil's Due: Sella gains command authority over deckhands and advantage on crew-related checks
  • Halda's endorsement: permanent +1 to Persuasion checks made aboard ship
  • The Keelbreaker's Mallet, recovered from the caulker's kit in the bilge
Narrative Rewards
  • Public exoneration before the whole crew after nine years of blame
  • Halda Storm says the words: it was never your ship to lose

The Tally of the Third Voyage

Sella keeps a private tally of who stood where when the old ship went down, and one name on it never made sense: the bosun who ordered her below decks minutes before the hull opened. Rumour places him alive in Harrowgate, grey-robed, among the sea-burial priests of the Ash Chorus. Sella must find him in the burned warehouse cell, get his account of the third voyage, and decide whether he was a coward, a traitor, or the only other person who knew the hull was cut before they ever sailed.

Starting point

Track the bosun's name through Harrowgate's shrine register and the Grey Gull's gossip.

Choice

Tell Halda the bosun may be Chorus, or keep the hunt private.

Halda will want him taken alive; the Chorus will want him silenced.
Mechanical Rewards
  • The bosun's logbook page: proof the third voyage was sabotaged before it sailed, worth 300 gp to Archivist Venn
  • Advantage on Insight checks against Chorus members for the rest of the campaign
Narrative Rewards
  • Sella learns she was ordered below decks to be the designated survivor, not the scapegoat
  • A name crossed off her tally for good

Keel and Chain

When the party breaks the blood-price altar at the Ninth Terrace, the chain that held Nesa falls open, and Sella picks it up without knowing why. The chain remembers. Wrapped around her fist, it shows her fragments of every offering ever made, including the face of the caulker who cut the old hull, kneeling at this same altar as a young man of one of the seven families. Sella must trace his bloodline to its last living descendant in Lordinium and decide what the harbour owes a family that fed a god for a thousand years.

Starting point

Read the chain's visions and identify the caulker's family name.

Choice

Wear the chain openly or hide it from the crew.

The crew grows uneasy around a woman wearing the chains of an offering.
Mechanical Rewards
  • Nesa's Chain as a permanent weapon and attunement slot
  • The descendant's testimony: advantage on saving throws against the Thirteenth's offers at the Heart
Narrative Rewards
  • Sella sees the whole thousand-year ledger of the blood price through the eyes of one caulker's family
  • A choice about inherited guilt that mirrors her own nine years of blamed innocence

Character Quests for Brother Anselm Tye

The Three Days

Anselm carries three torn pages hidden in the back of his prayer book: a firsthand transcript of Aldous's predecessor dying raving about the price — the fog wall, the words that open it, and the phrase 'one life, freely given, every moon.' He must one day read them aloud in the shrine at Harrowgate, before the memorial candles, and let Priest Aldous decide whether he is a coward or a witness. Aldous holds the predecessor's journal and will only surrender it to someone who can match it against a firsthand account, so Anselm's confession is the key to the expedition's best map of the fog wall.

Starting point

Return to Harrowgate and ask Aldous for the predecessor's journal; be refused until a firsthand account is offered.

Choice

Admit to Aldous that he was in the room when the old man died.

Aldous's demeanor shifts from weary patience to sharp attention; he tests Anselm's memory of the raving before he will consider the request.
Mechanical Rewards
  • Aldous's journal, containing the words that open the fog wall — the expedition's strongest clue for the Fogwall Trial in Act II.
  • Anselm regains the ability to pray honestly: once per long rest he may reroll a failed Wisdom saving throw against fear or charm, reflecting a faith restored rather than performed.
  • The shrine's blessing: Anselm's Cure Wounds heals one additional hit point when cast on a crew member of the Sea-Devil's Due, as the Twelve's favor visibly returns to him.
Narrative Rewards
  • Aldous publicly names Anselm a witness, not a coward, ending nine years of self-imposed exile from the shrine.
  • Anselm's confession becomes the first honest prayer he has spoken since he left; his hollow doubt begins to close.

The Buried Ledger

In nine years of burying sailors for coin, Anselm has kept a private ledger of every body he has committed to the sea, with the port, the date, and the ship's name. Reading the heretic codex recovered from Gullclaw Cay, he notices that the lost list in Harrowgate shrine and his own ledger do not agree: four men he personally buried in Lordinium are listed in the shrine as lost at the fog wall, years after he laid them in the ground. Someone is adding names to the lost list who never sailed north — and Anselm must find out who is falsifying the register of the dead, and why the Ash Chorus wants the list of the drowned to look longer than it is.

Starting point

Compare his burial ledger against the shrine's register and the heretic codex's margin, cross-referencing the four impossible names.

Choice

Show his private ledger to the party, admitting he has profited from death for nine years.

Anselm's shame at taking coin for rites is exposed to his companions, deepening his theme of honest faith versus performed ritual.
Mechanical Rewards
  • A copied page of the Chorus's falsification orders, signed in grey wax — hard evidence that the Ash Chorus manipulates the dead, usable against the cell in the burned warehouse (advantage on the Persuasion or Intimidation check with Captain Kane).
  • Anselm gains proficiency in Investigation, honed by cross-referencing registers, ledgers and codices.
Narrative Rewards
  • The families of four men learn their relatives died at home, not at the fog wall — and one of those families owes Anselm a debt they will repay in Harrowgate.
  • Anselm's ledger of the buried becomes a record the Chorus fears, and grey-robed priests begin to know his name.

The Rite He Cannot Finish

There is one body Anselm has never been able to bury: his own brother, Tomas Tye, a fisherman lost off Gullclaw Cay eleven years ago, before Anselm ever left Harrowgate. The body was never found, no rite was ever said, and Anselm's departure from the shrine the following winter was as much flight from that unfinished grave as from the dying man's screams. When the Sea-Devil's Due anchors at Gullclaw Cay, Anselm has a chance he has never had: to search the caves and shingle where the sea gives back what it takes, say the rite at last, and find out — from Odran the light-keeper, who has watched that water for thirty years — what the tide brought ashore the week Tomas vanished.

Starting point

Ask Odran what the sea returned in the week Tomas Tye was lost, and search the shingle and sea caves of Gullclaw Cay for any trace.

Choice

Tell Odran the lost man was his brother, or search quietly without explaining himself.

Odran, himself a grieving father, responds very differently to a fellow mourner than to a stranger poking through his shore.
Mechanical Rewards
  • Inside the oilskin coat, a small copper charm of the Twelve — Tomas's — which Anselm adds to his holy symbol; thereafter, when Anselm reduces a creature to 0 hit points with Sacred Flame, he may instead choose to have the flame miss and turn, once per long rest, reflecting a healer who refuses to kill in his brother's name.
  • Tamsin's testimony about the grey-robed buyer's coin, an early clue pointing at Maelis Vane.
Narrative Rewards
  • Anselm finally grieves his brother, and the reason he left Harrowgate becomes something he can name instead of flee.
  • Odran, seeing the rite done, gives the party his chart of the northern currents unprompted.

Step into your campaign

A world you can explore

Play a 3D adventure with your party: explore settlements, wilderness and dungeons, and fight in real time with pause. Best on a desktop or laptop with a mouse and keyboard.

Play in browser

Encounters

Bilge Water in the Cradle

Suggested Level: 1–2

While the party inspects the four cut plates in the cradle, Halda Storm sends them into the bilge to check the inner ribs. The water is knee-deep, black, and something in it has been waiting for a lantern to come close.

Creatures

Terrain Features

Knee-deep water counts as difficult terrain. The bilge is cramped: the ceiling is 4 feet high in places, so Medium characters are squeezed and have disadvantage on attack rolls with heavy weapons. A single cresset hangs at the ladder; if it is knocked into the water the area goes dark. The ribs of the hull give half cover to anyone pressed against them.

Treasure

A caulker's kit wedged in the ribs, a purse of 12 gp in old coin, and a chalk cross on the inner rib — the same mark found on the ship that sank under Sella Rooke nine years ago.

DM Notes

For a party of three, use one hull-ghoul. For five or six characters, add a third hull-ghoul and give the bilge a slick of oil that ignites if a torch is dropped. For a level 1 party, have the ghouls start prone in the water so the first round is spent standing up.

The Cave Under the Light

Suggested Level: 3

Tamsin Quill is unwrapping the heretic codex when the gulls outside go silent. A Chorus cell has come in through the low-tide entrance to burn the cave and take the book.

Creatures

Terrain Features

The cave is 30 feet wide and 60 feet long, with a low shelf of rock down the middle that gives half cover. Crates of brandy and oilcloth parcels give cover but are flammable: a dropped torch sets a 10-foot square alight for 1d6 fire damage per round. The low-tide entrance is a 5-foot-wide gap that floods in two hours. The main entrance is a shingle slope up to the light.

Treasure

The heretic codex (see the *codex of the erased verse* magic item), 80 gp in Chorus coin stamped with thirteen dots, a sealed oilcloth parcel addressed to a grey-robed buyer in Harrowgate, and Tamsin's price of 200 gp or a favour.

DM Notes

For a level 2 party, drop the priest and use three cultists. For a level 4 party, add a second priest and an *ash-wrapped penitent*. For six characters, add two more cultists and let the priest cast hold person once.

The Burned Warehouse

Suggested Level: 4

Captain Verity Kane will grant the expedition a licence only if the party clears the Chorus cell in the burned warehouse. The cell is holding Greta Hearthstone's brother, a Guild courier, in the cellar.

Creatures

Terrain Features

The cellar is 40 by 30 feet with a low beam ceiling and a floor of wet ash that counts as difficult terrain. Two support pillars give half cover. The burned upper floor is unstable: a creature that takes 10 or more fire damage in a round brings down a section of charred beam (DC 13 Dexterity saving throw, 2d6 bludgeoning). The courier is chained to a ring in the far wall.

Treasure

A crate of Guild charts including a partial chart of the smoking strait, 120 gp in Chorus coin, a ledger of offerings, and the courier himself — freed, he gives the party Greta's information and the Guild's goodwill.

DM Notes

For a level 3 party, use one penitent and three cultists. For a level 5 party, add a priest and a third penitent. For six characters, add two cultists and give the cellar a barrel of alchemist's fire that can be knocked over.

The Serpent in the Smoke

Suggested Level: 6

On the second night in the strait, the ship slows in a shifting channel. Something long and black surfaces alongside the rudder, and the water around it begins to steam.

Creatures

Terrain Features

The deck is 20 feet wide and 60 feet long, with the mast, the capstan and two hatch covers as cover. The rail is a 3-foot wall; going over it means falling into burning water (2d6 fire damage at the start of each turn and difficult terrain). Smoke gives heavily obscured conditions beyond 30 feet. The rigging can be climbed (DC 12 Athletics) for a height advantage.

Treasure

The serpent's gullet holds a brass ship's bell from a Chorus vessel and a watertight case with 300 gp in old coin. The emberfins carry the rotted effects of the first expedition: a signet ring worth 50 gp and a letter naming Ottilie as a cabin hand.

DM Notes

For a level 5 party, use the serpent alone and remove its Scalding Breath recharge on the first round. For a level 7 party, add a third emberfin and let the serpent grapple with its tail. For six characters, add two more emberfins and a burning shoal that drifts across the deck.

The Flooded Hold

Suggested Level: 7

Elspeth Vane will trade the logbook for passage off the reef, but the strongbox is in the flooded hold. The drowned crew of the first expedition did not stay dead, and they do not want the box opened.

Creatures

Terrain Features

The hold is 50 by 30 feet, waist-deep in water (difficult terrain, and swimming for shorter characters). Floating crates give half cover and can be pushed. The water is cold: a character who starts their turn fully submerged takes 1d4 cold damage. Two gaps in the hull let in burning water — a 5-foot square of scalding sea that deals 1d6 fire damage to anyone entering it.

Treasure

The first expedition's strongbox: a Chorus reliquary worth 250 gp, a map of the island's nine terraces, and a *potion of water breathing*. Also the logbook, if Elspeth has not already handed it over, and 200 gp in rotted sea chests.

DM Notes

For a level 6 party, use three deckhands and one emberfin. For a level 8 party, add two more deckhands and a *fog-bleeding shade* that has seeped in through the hull. For six characters, add a third emberfin and make the cold water deal 1d6.

The Warden's Toll

Suggested Level: 8

Cassian names the price and waits. If the party refuses to pay, or tries to force the gate, the fog itself comes down to collect — and a Chorus ship that has been shadowing them takes the chance to strike.

Creatures

Terrain Features

The water is flat and grey and gives no footing; characters fight on the deck, the boarding plank, or the basalt arch's base. The fog wall is 20 feet away and anyone pushed into it is grappled by the fog (escape DC 15) and takes 2d6 necrotic damage per round. The arch itself is 30 feet high with a ledge at 15 feet. The Chorus ship is 30 feet off the port bow.

Treasure

The Chorus ship's strongbox holds 400 gp, a sealed letter from Maelis Vane naming the Ninth Terrace, and a *Warden's coral mask* if Cassian is freed. Cassian himself, if freed, gives the words that open the gate.

DM Notes

For a level 7 party, use two shades and one penitent. For a level 9 party, add a third penitent and a *smoke-shoal serpent* surfacing beside the Chorus ship. For six characters, add two more shades and let the fog grapple anyone who ends their turn within 10 feet of the wall.

The Shrine That Twists

Suggested Level: 9

Miri Salt warns the party away from the shrine, but the Chorus altar inside is what has been twisting the island's creatures. A priest and four cultists maintain it, and the beach itself is not empty.

Creatures

Terrain Features

The bone beach is difficult terrain in patches and gives no cover. The shrine is a 20-foot-square stone building with a low doorway and a stone bowl altar in the centre. The forest wall begins 30 feet behind the shrine and is dense cover. The altar radiates a 10-foot aura of necrotic energy: a creature that ends its turn there takes 1d6 necrotic damage.

Treasure

The Chorus ledger naming Maelis Vane as Crowned Vessel and the Ninth Terrace as the true altar, a gold-and-obsidian censer worth 500 gp, 150 gp in Chorus coin, and the shrine's bowl (a *censer of the thirteenth*).

DM Notes

For a level 8 party, drop the orchid-maw stalker and use one crab. For a level 10 party, add a second orchid-maw stalker and an *ash-wrapped penitent*. For six characters, add two cultists and let the priest cast banishment once.

The Blooming Ruins

Suggested Level: 10

A Chorus patrol is sweeping the outer ring for the party, and the ruins themselves are hunting. Two orchid-maw stalkers have taken root in the market plaza and do not distinguish between grey robes and anyone else.

Creatures

Terrain Features

The plaza is 80 feet across, paved and cracked, with market stalls giving half cover and rotted awnings that collapse if struck (DC 12 Dexterity saving throw or restrained until the character uses an action to tear free). A dry fountain in the centre gives full cover. Vines on the inner wall can be climbed (DC 13 Athletics).

Treasure

A Chorus patrol satchel with 200 gp, a written order from Maelis Vane to hold the outer ring, and a map marking the archive in the fourth ring. One cultist carries a *potion of greater healing*.

DM Notes

For a level 9 party, use one stalker and three cultists. For a level 11 party, add a second patrol of four cultists arriving in round three. For six characters, add an *ash-wrapped penitent* and let the stalkers use False Bloom to start hidden.

The Ledgers of the Sevenfold

Suggested Level: 10

The sacrifice ledgers are in a locked stone cabinet behind the shelves. The archive's own guardians do not want them taken, and a Chorus squad has come to burn them.

Creatures

Terrain Features

The archive is 40 feet across with shelves giving half cover and a stone lectern in the centre giving full cover. The floor is covered in loose script that counts as difficult terrain for anyone who is not Ulric. The cabinet is stone and requires two successful DC 15 Strength checks to open. Fire in the archive spreads along the script: a 10-foot square burns for 1d6 fire damage per round.

Treasure

The sacrifice ledgers (see the *ledger of the sevenfold* magic item), 300 gp in ancient coin from the archive strongbox, a ceremonial headdress worth 250 gp, and Ulric's blessing.

DM Notes

For a level 9 party, use three ink-wisps and one penitent. For a level 11 party, add two more ink-wisps and a priest who arrives in round two. For six characters, add a third penitent and let the fire spread one square per round.

The Altar Made Ready

Suggested Level: 11

The Chorus is unrolling a long canvas shroud across the altar to receive the expedition's crew. Nesa is chained to the tallest pillar. Two chain-choked offerings stand guard at the drain.

Creatures

Terrain Features

The pit is 60 feet across with nine pillars giving half cover. The altar is a 10-foot black stone table; a creature that ends its turn within 10 feet of it takes 1d6 necrotic damage and cannot regain hit points. The drain is a 5-foot shaft in the floor — a creature dragged into it takes 2d6 bludgeoning and is restrained. The stairs up are the only exit until the altar breaks.

Treasure

The Chorus's reliquary censer (500 gp), 250 gp in Chorus coin, the shroud itself (a *shroud of the last offering*), and Nesa's freedom. Breaking the altar opens a shaft down to the Heart.

DM Notes

For a level 10 party, use one chain-choked offering and three cultists. For a level 12 party, add a second priest and a third offering. For six characters, add two cultists and let the altar's aura extend to 15 feet.

The Heart of Borealis

Suggested Level: 12

Maelis Vane has been waiting a year for a crew to finish the price. She offers the party a place in the Chorus before she fights, and the Thirteenth offers each of them the one thing they want most.

Creatures

Terrain Features

The crater floor is 120 feet across, ringed by loose white chains that count as difficult terrain. The crater's edge is a 60-foot drop into fog. The Thirteenth's chains give half cover to anyone standing behind them. The air is thick: ranged attacks beyond 60 feet have disadvantage. If the altar was broken, the Thirteenth's regeneration is gone and the island's creatures stop fighting.

Treasure

Maelis's reliquary crown (see the *crown of the vessel* magic item), 1,000 gp in Chorus treasure, the Chorus's inner-circle regalia worth 750 gp, and the fate of the Thirteenth.

DM Notes

For a level 11 party, drop the chain-choked offering and use two cultists. For a party of six, add a second chorister and two more cultists. If the party broke the altar, remove the Thirteenth's regeneration and reduce Maelis's hit points by a quarter.

Magic Items

Keelbreaker's Mallet Keelbreaker's Mallet Completed

Keelbreaker's Mallet

Uncommon
A dock caulker's mallet with a head of green copper and a haft wrapped in tarred rope. Struck against a hull, a door, or a shield, it rings like a ship's bell and never splinters.

Location

Act I — the Lordinium Dry Docks, in the caulker's kit wedged in the bilge ribs of the Sea-Devil's Due

Attunement

False

Salt-Stained Compass Salt-Stained Compass Completed

Salt-Stained Compass

Common
A brass compass whose needle points not north but toward the nearest body of salt water, and which never fogs over. Its glass is etched with the words *the sea keeps what it is given*.

Location

Act I — the Salt Crown tavern in Lordinium, left as a stake by a sailor who did not come back for it

Attunement

False

Codex of the Erased Verse Codex of the Erased Verse Completed

Codex of the Erased Verse

Uncommon
A heretic copy of the scriptures of the Twelve, its margins still carrying the ghost of a scraped-out warning. Reading it aloud steadies the reader against fear of the divine.

Location

Act I — the sea cave under the Gullclaw light, in Tamsin Quill's oilcloth parcel

Attunement

True — by a spellcaster or a character trained in Religion

Ottilie's Fathom Ring Ottilie's Fathom Ring Completed

Ottilie's Fathom Ring

Uncommon
A plain copper ring on a tarred cord, worn by a cabin hand who reached the fog wall. It lets the wearer hold their breath far longer than they should and hear voices through water.

Location

Act II — the flooded hold of the Penitent Star, in a rotted sea chest beside the strongbox

Attunement

True — by any creature

Emberfin Lantern Emberfin Lantern Completed

Emberfin Lantern

Uncommon
A ship's lantern with a shard of glowing emberfin glass for a wick. It burns without oil, gives light in smoke and fog, and its flame does not go out in wind or water.

Location

Act II — the smoking strait, salvaged from the wreckage of a Chorus vessel the serpent sank

Attunement

False

Warden's Coral Mask Warden's Coral Mask Completed

Warden's Coral Mask

Rare
A mask of grey coral that smells of cold fog. Worn, it lets the wearer see through fog and mist and understand the speech of things that live in them.

Location

Act II — the Fogwall Gate, given by Cassian if he is freed or taken from the arch if he is destroyed

Attunement

True — by any creature

Censer of the Thirteenth Censer of the Thirteenth Completed

Censer of the Thirteenth

Rare
A gold-and-obsidian censer that burns without fuel and gives off a smoke that smells of iron. Its smoke reveals the shape of any bargain offered nearby.

Location

Act III — the Chorus shrine on the Strand of Bones, on the stone bowl altar

Attunement

True — by a cleric or paladin

Ledger of the Sevenfold Ledger of the Sevenfold Completed

Ledger of the Sevenfold

Very Rare
A shelf-heavy book of sacrifice ledgers bound in white stone boards. Reading it aloud names every offering made at the Ninth Terrace and weakens the Thirteenth's hold on its creatures.

Location

Act III — the archive of the Sevenfold Ruins, in the locked stone cabinet

Attunement

True — by a character trained in History or Religion

Nesa's Chain Nesa's Chain Completed

Nesa's Chain

Very Rare
A length of rusted chain that once held the last daughter of the old bloodline. Wrapped around a fist, it strikes true against anything that feeds on blood.

Location

Act III — the Ninth Terrace, on the pillar above the blood-price altar

Attunement

True — by a martial character

Shroud of the Last Offering Shroud of the Last Offering Completed

Shroud of the Last Offering

Rare
A long canvas shroud the Chorus unrolled across the altar. Worn as a cloak, it hides the wearer from the Thirteenth's sight and from anything that hunts by blood.

Location

Act III — the Ninth Terrace, in the hands of the Chorus priest during the Altar Made Ready encounter

Attunement

True — by any creature

Crown of the Vessel Crown of the Vessel Completed

Crown of the Vessel

Legendary
A reliquary crown of grey coral and old gold, worn by the Thirteenth's chosen. It grants a chorus of borrowed voices and the terrible certainty of the saved.

Location

Act III — the Heart of Borealis, worn by Maelis Vane

Attunement

True — by a spellcaster